


TF Beechcraft Bonanza F33A Build


 I like it, I like it!!!!
 09-15-2019, 03:02 AM
#254

Thread Starter
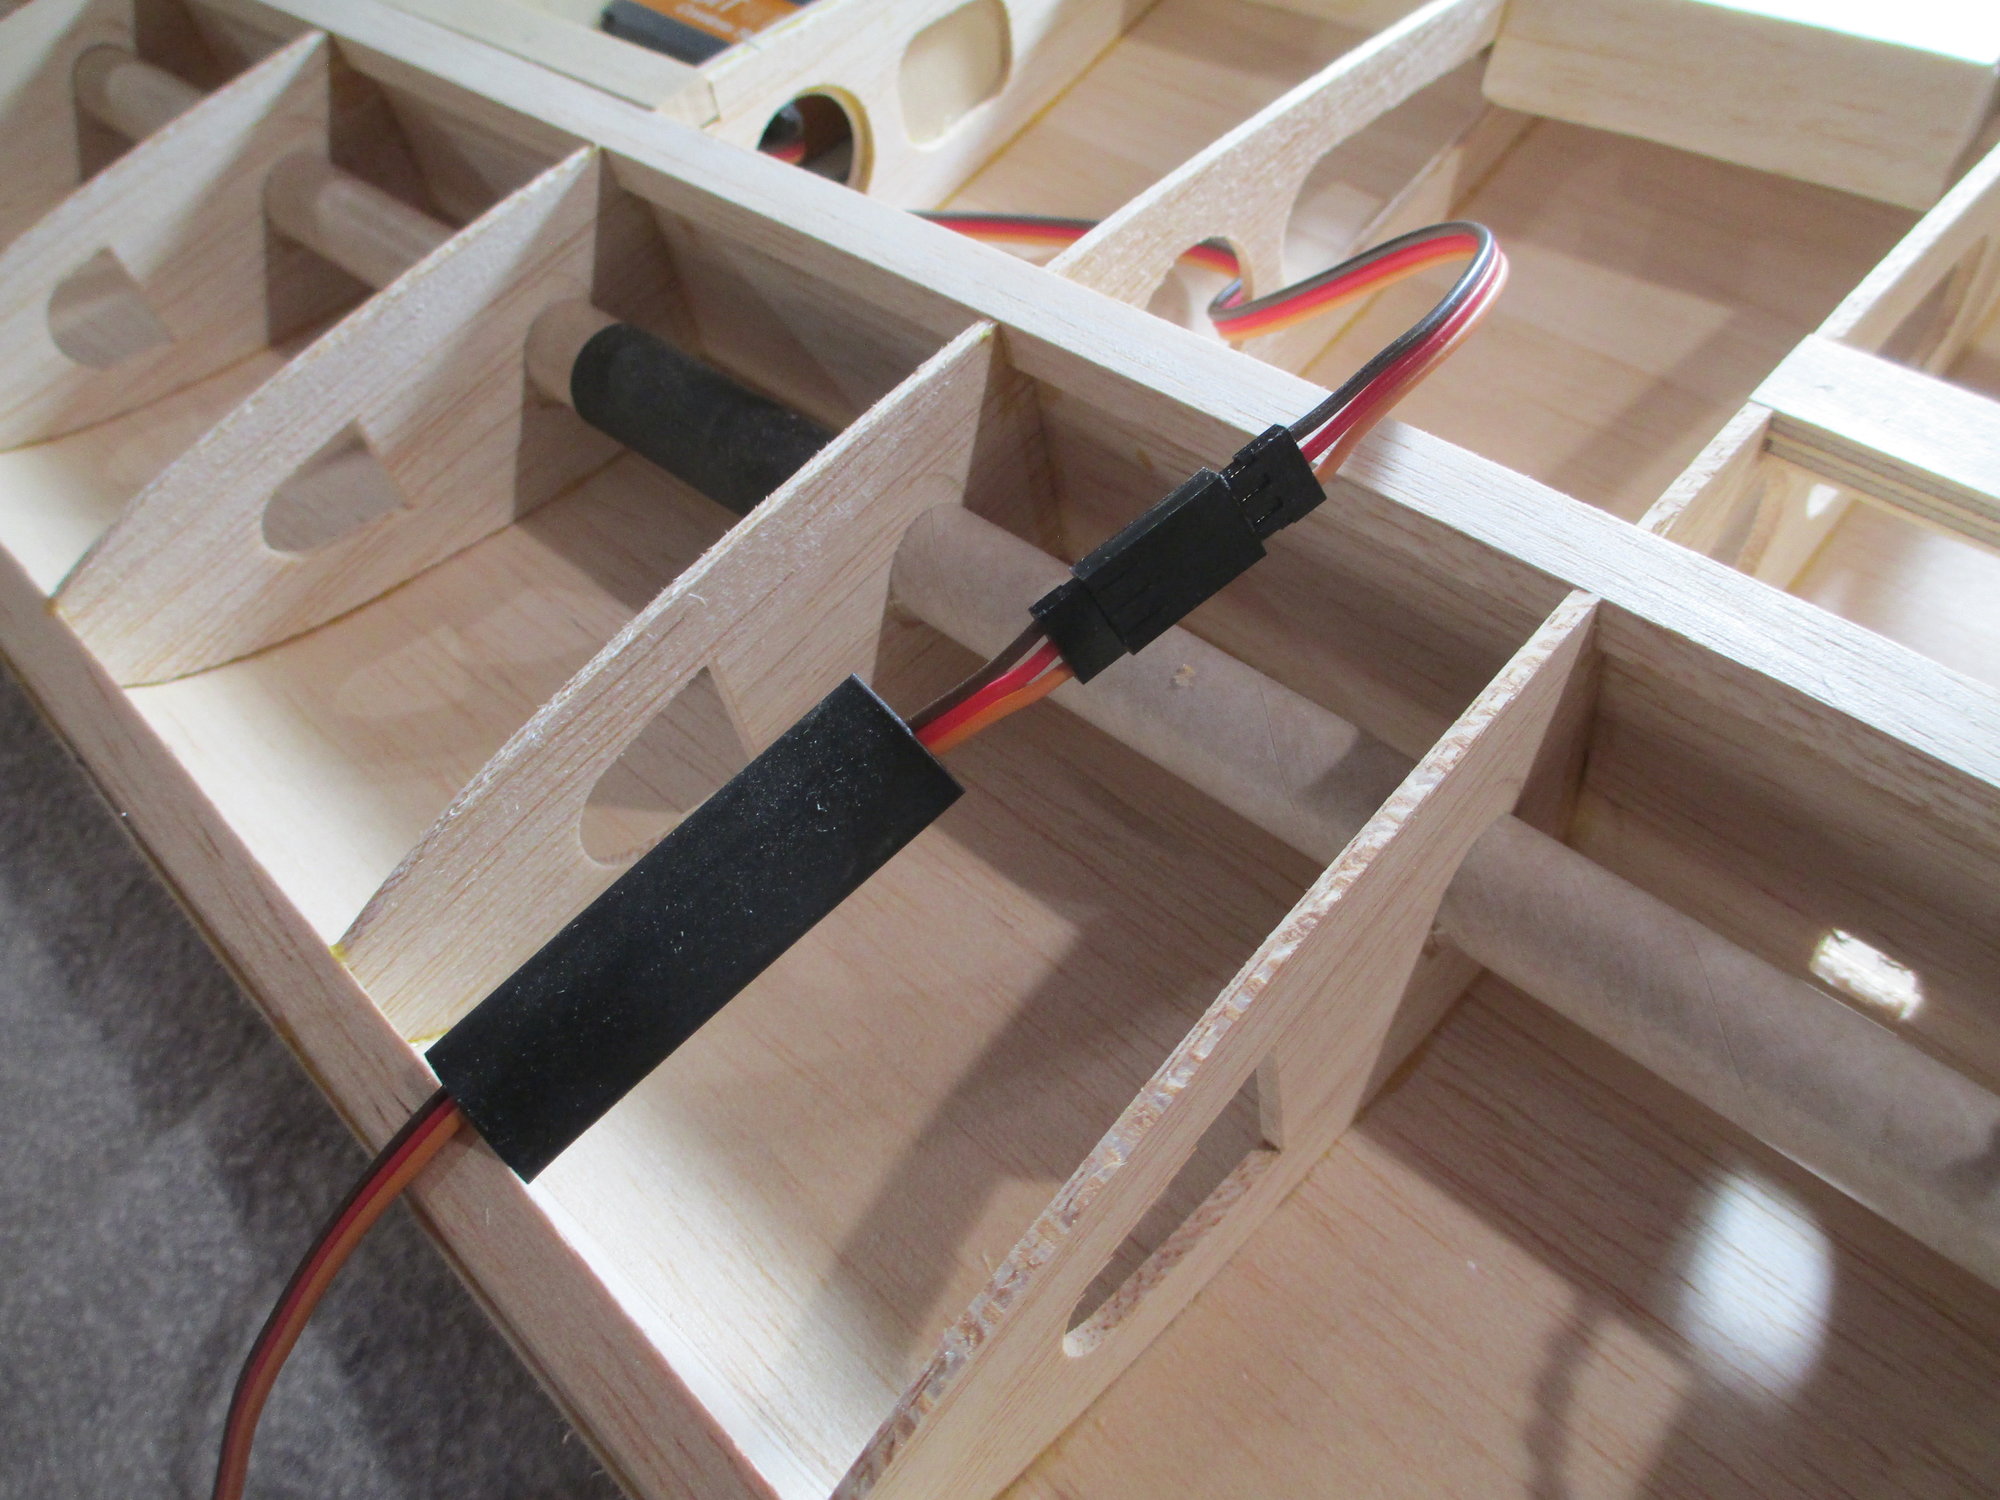
The aileron's servo wire is far too short to to reach its exit point at the top of the wing. This is a common problem that is easily rectified by adding in an extension to lengthen the lead. I want to make sure that the electrical connection never separates so I use heat shrink tubing to solve this problem. Here I've slipped a length of heat shrink over the extension wire.
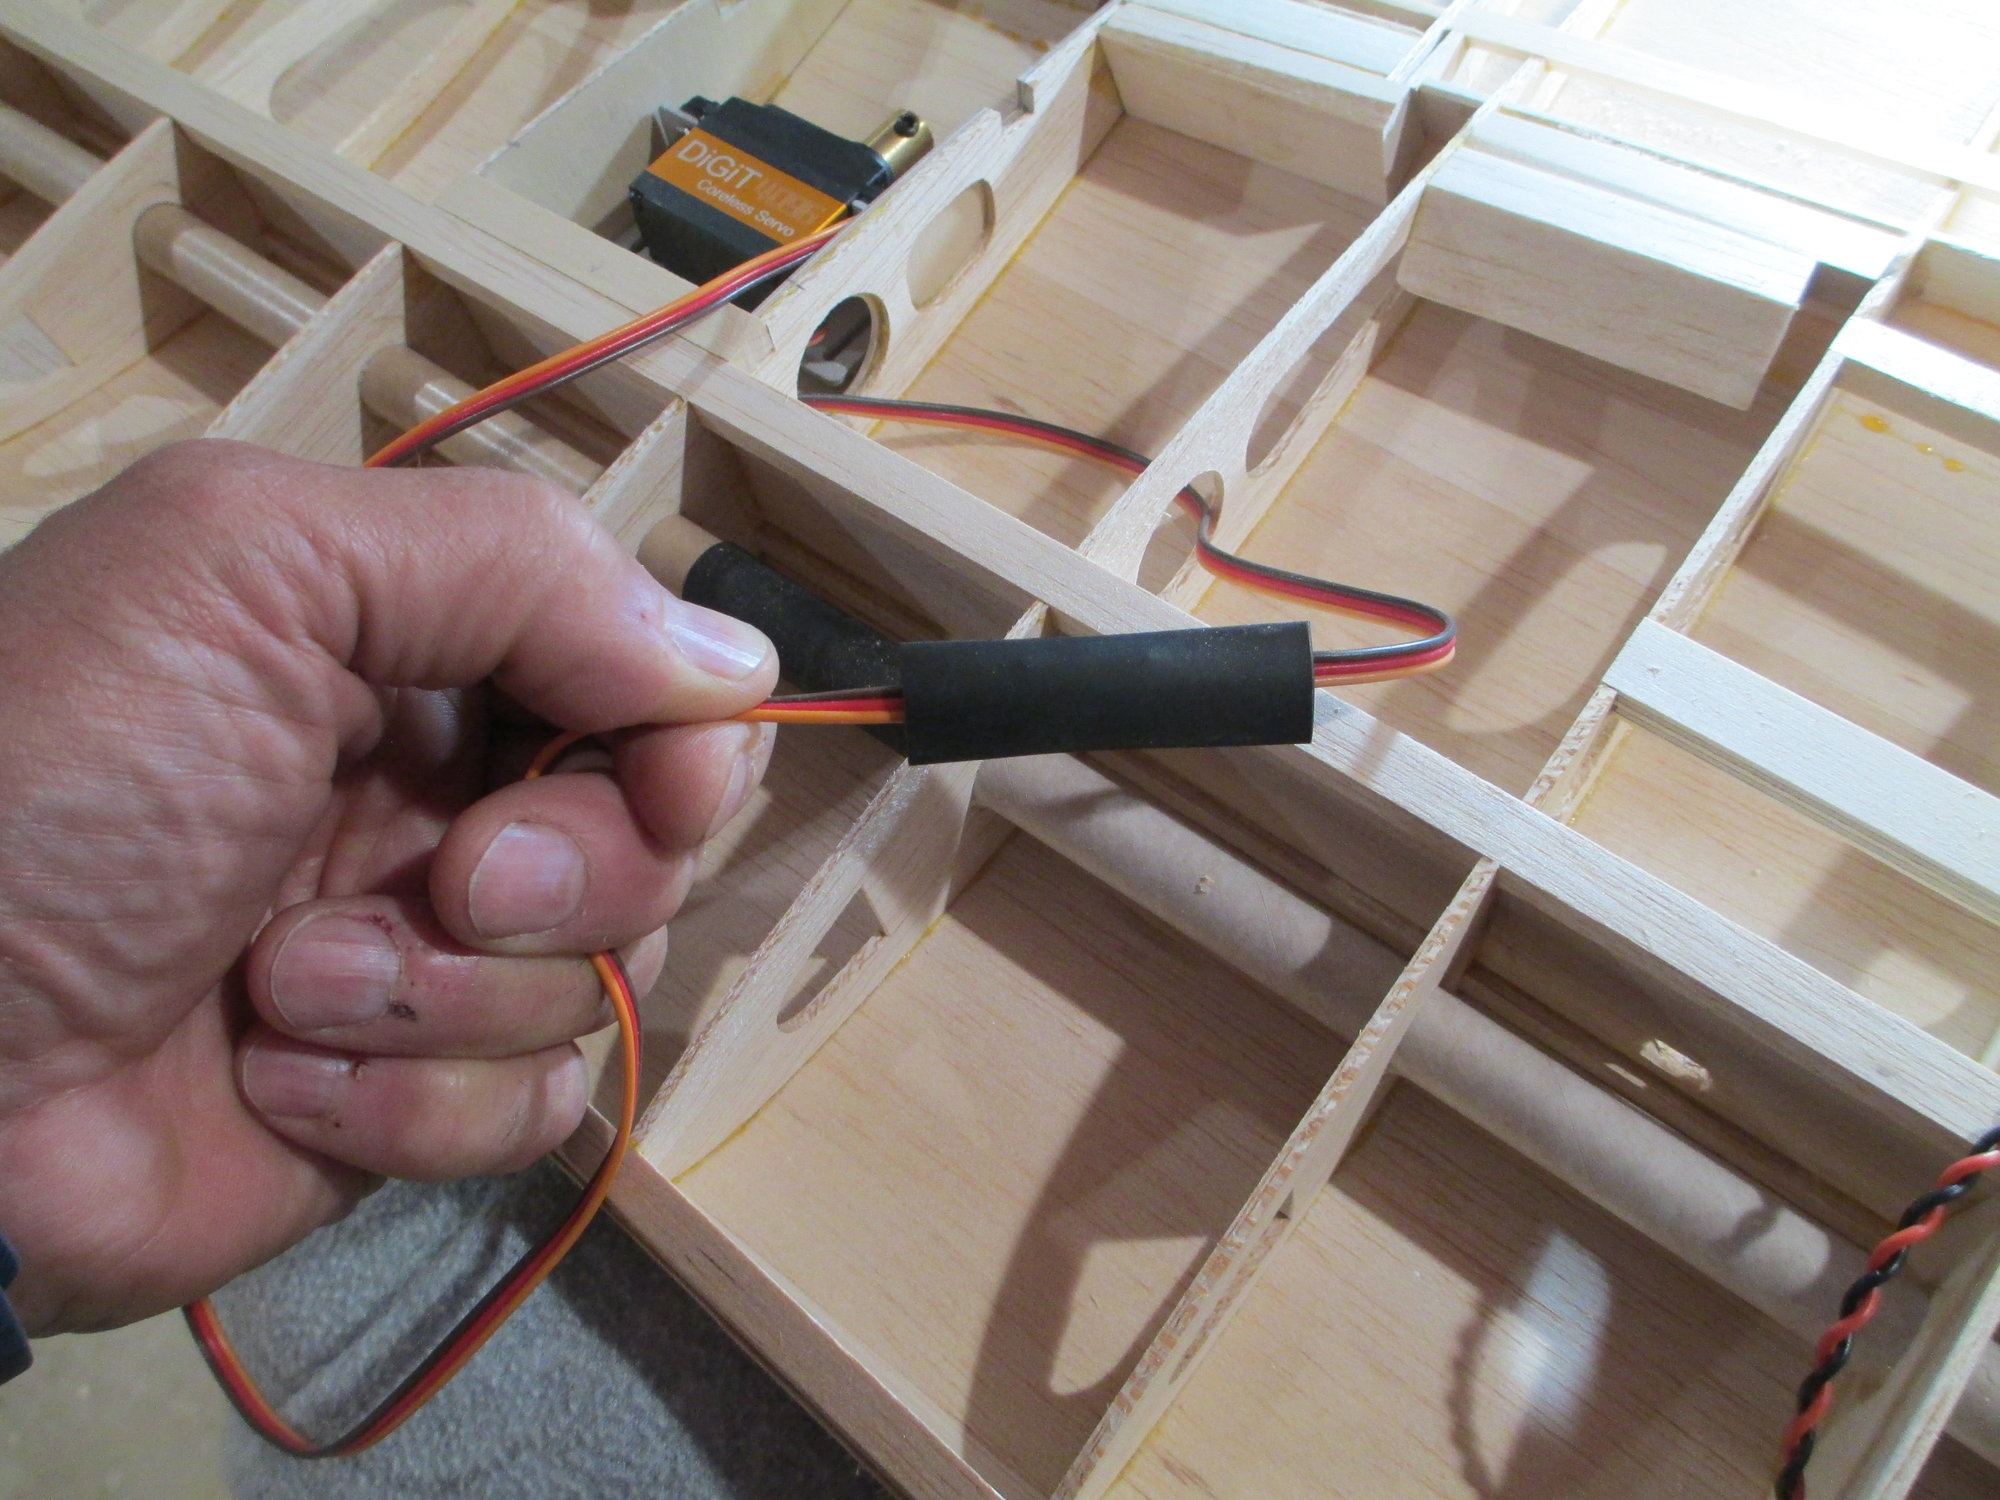
Simply slide the connector somewhere beneath the center point of the heat shrink.
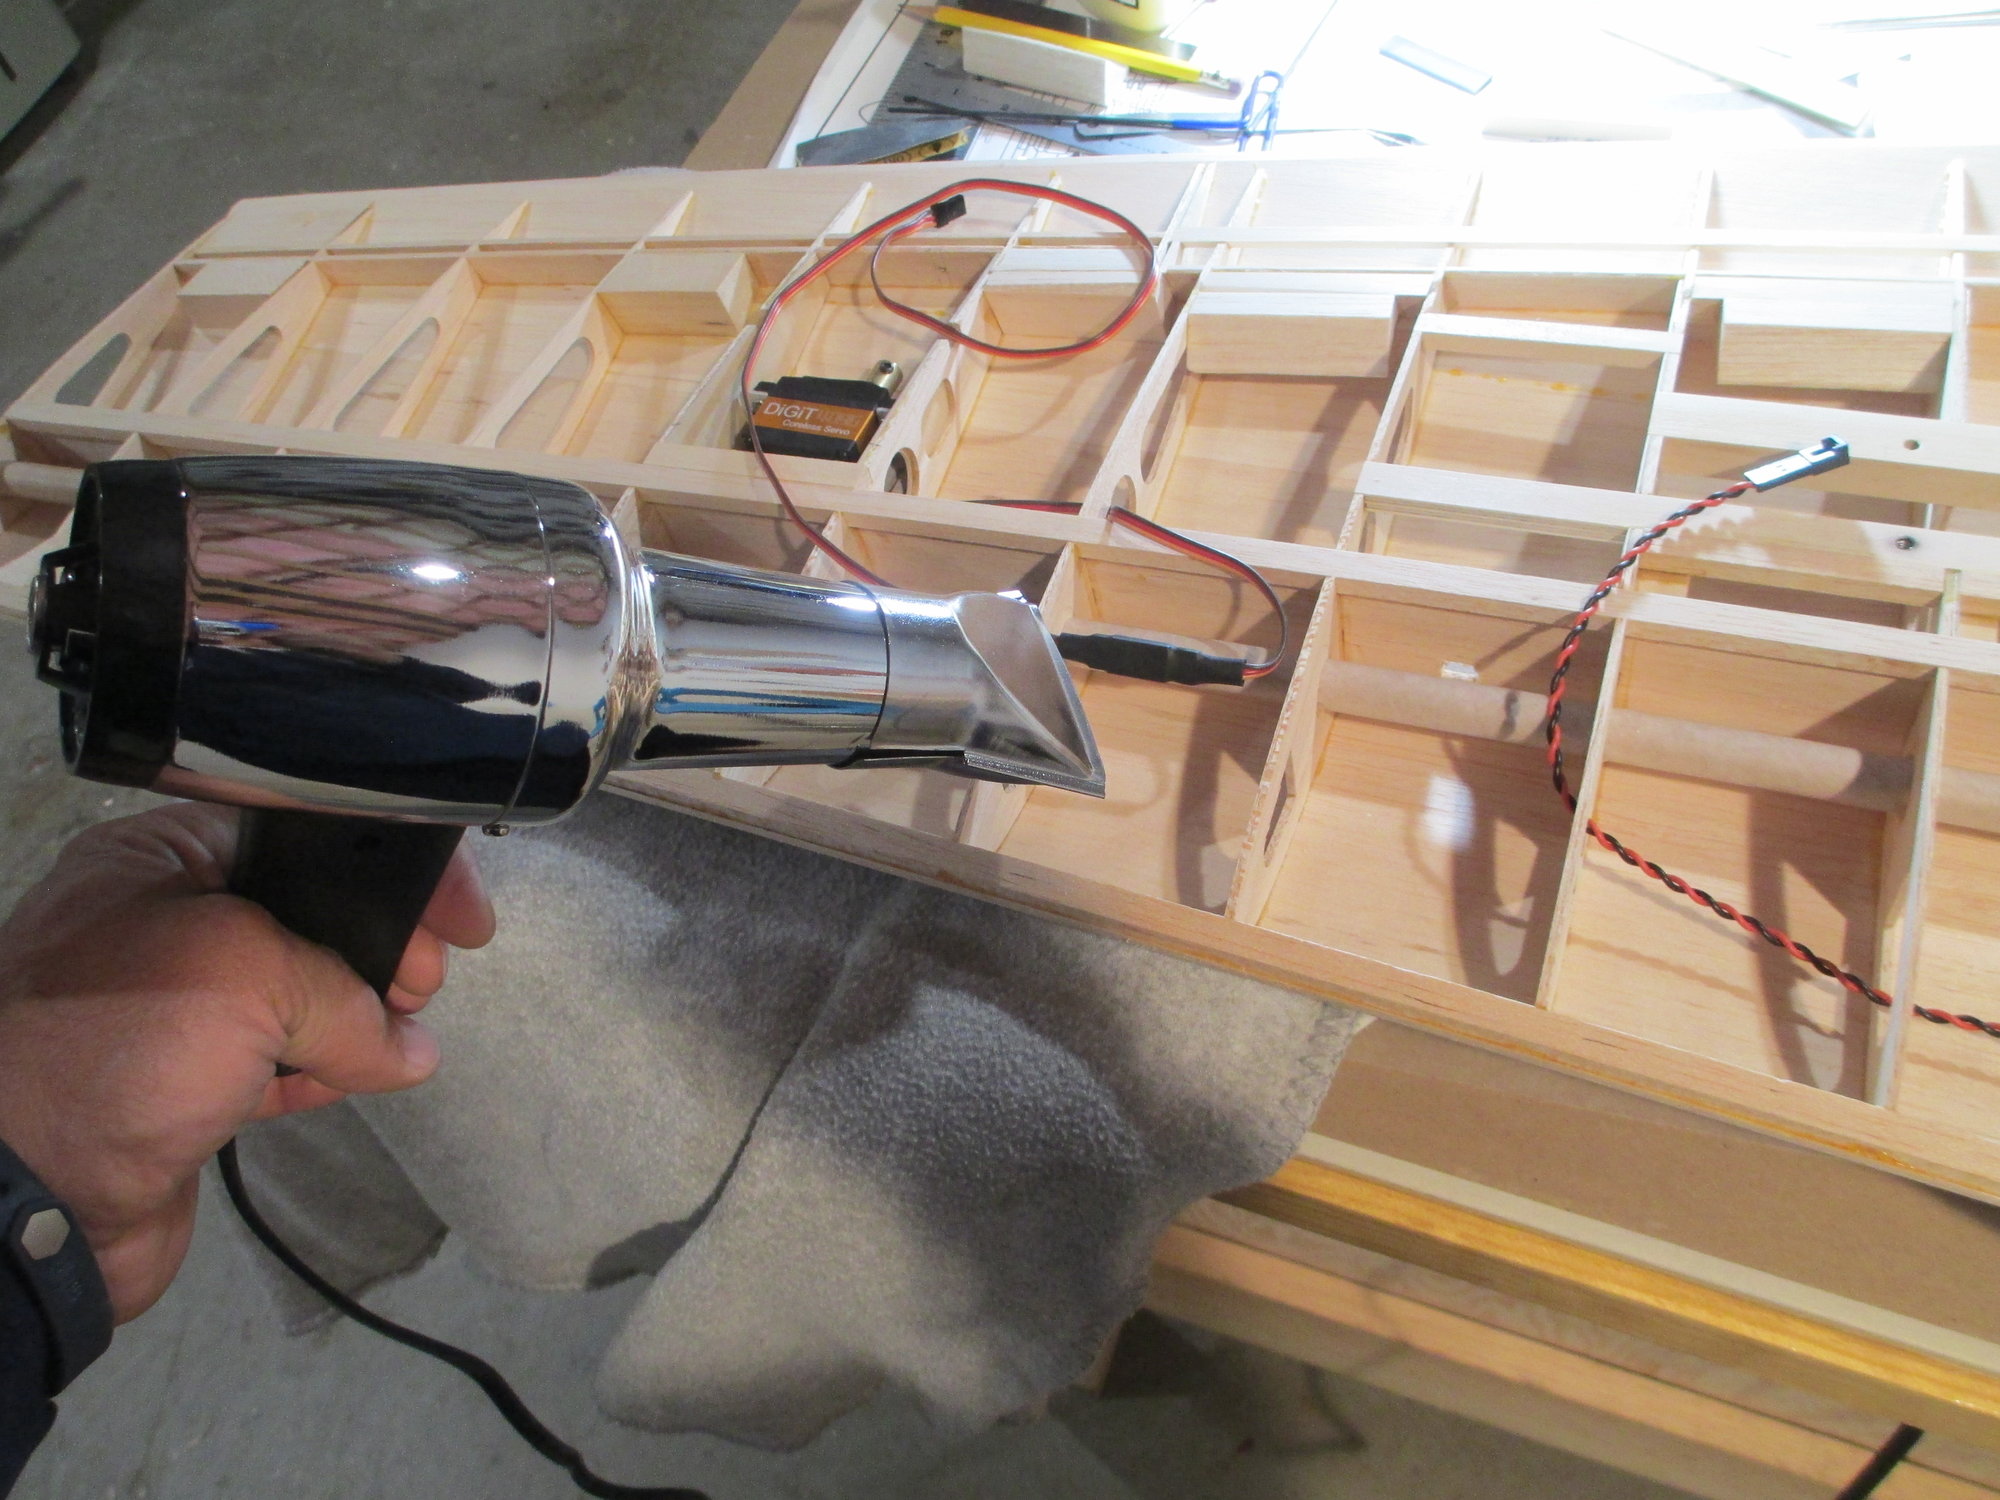
Using a heat gun, shrink the tubing. Some builders use a lighter for this purpose, but I prefer not to use that method, as it can apply too much heat melting the insulation wires beneath.
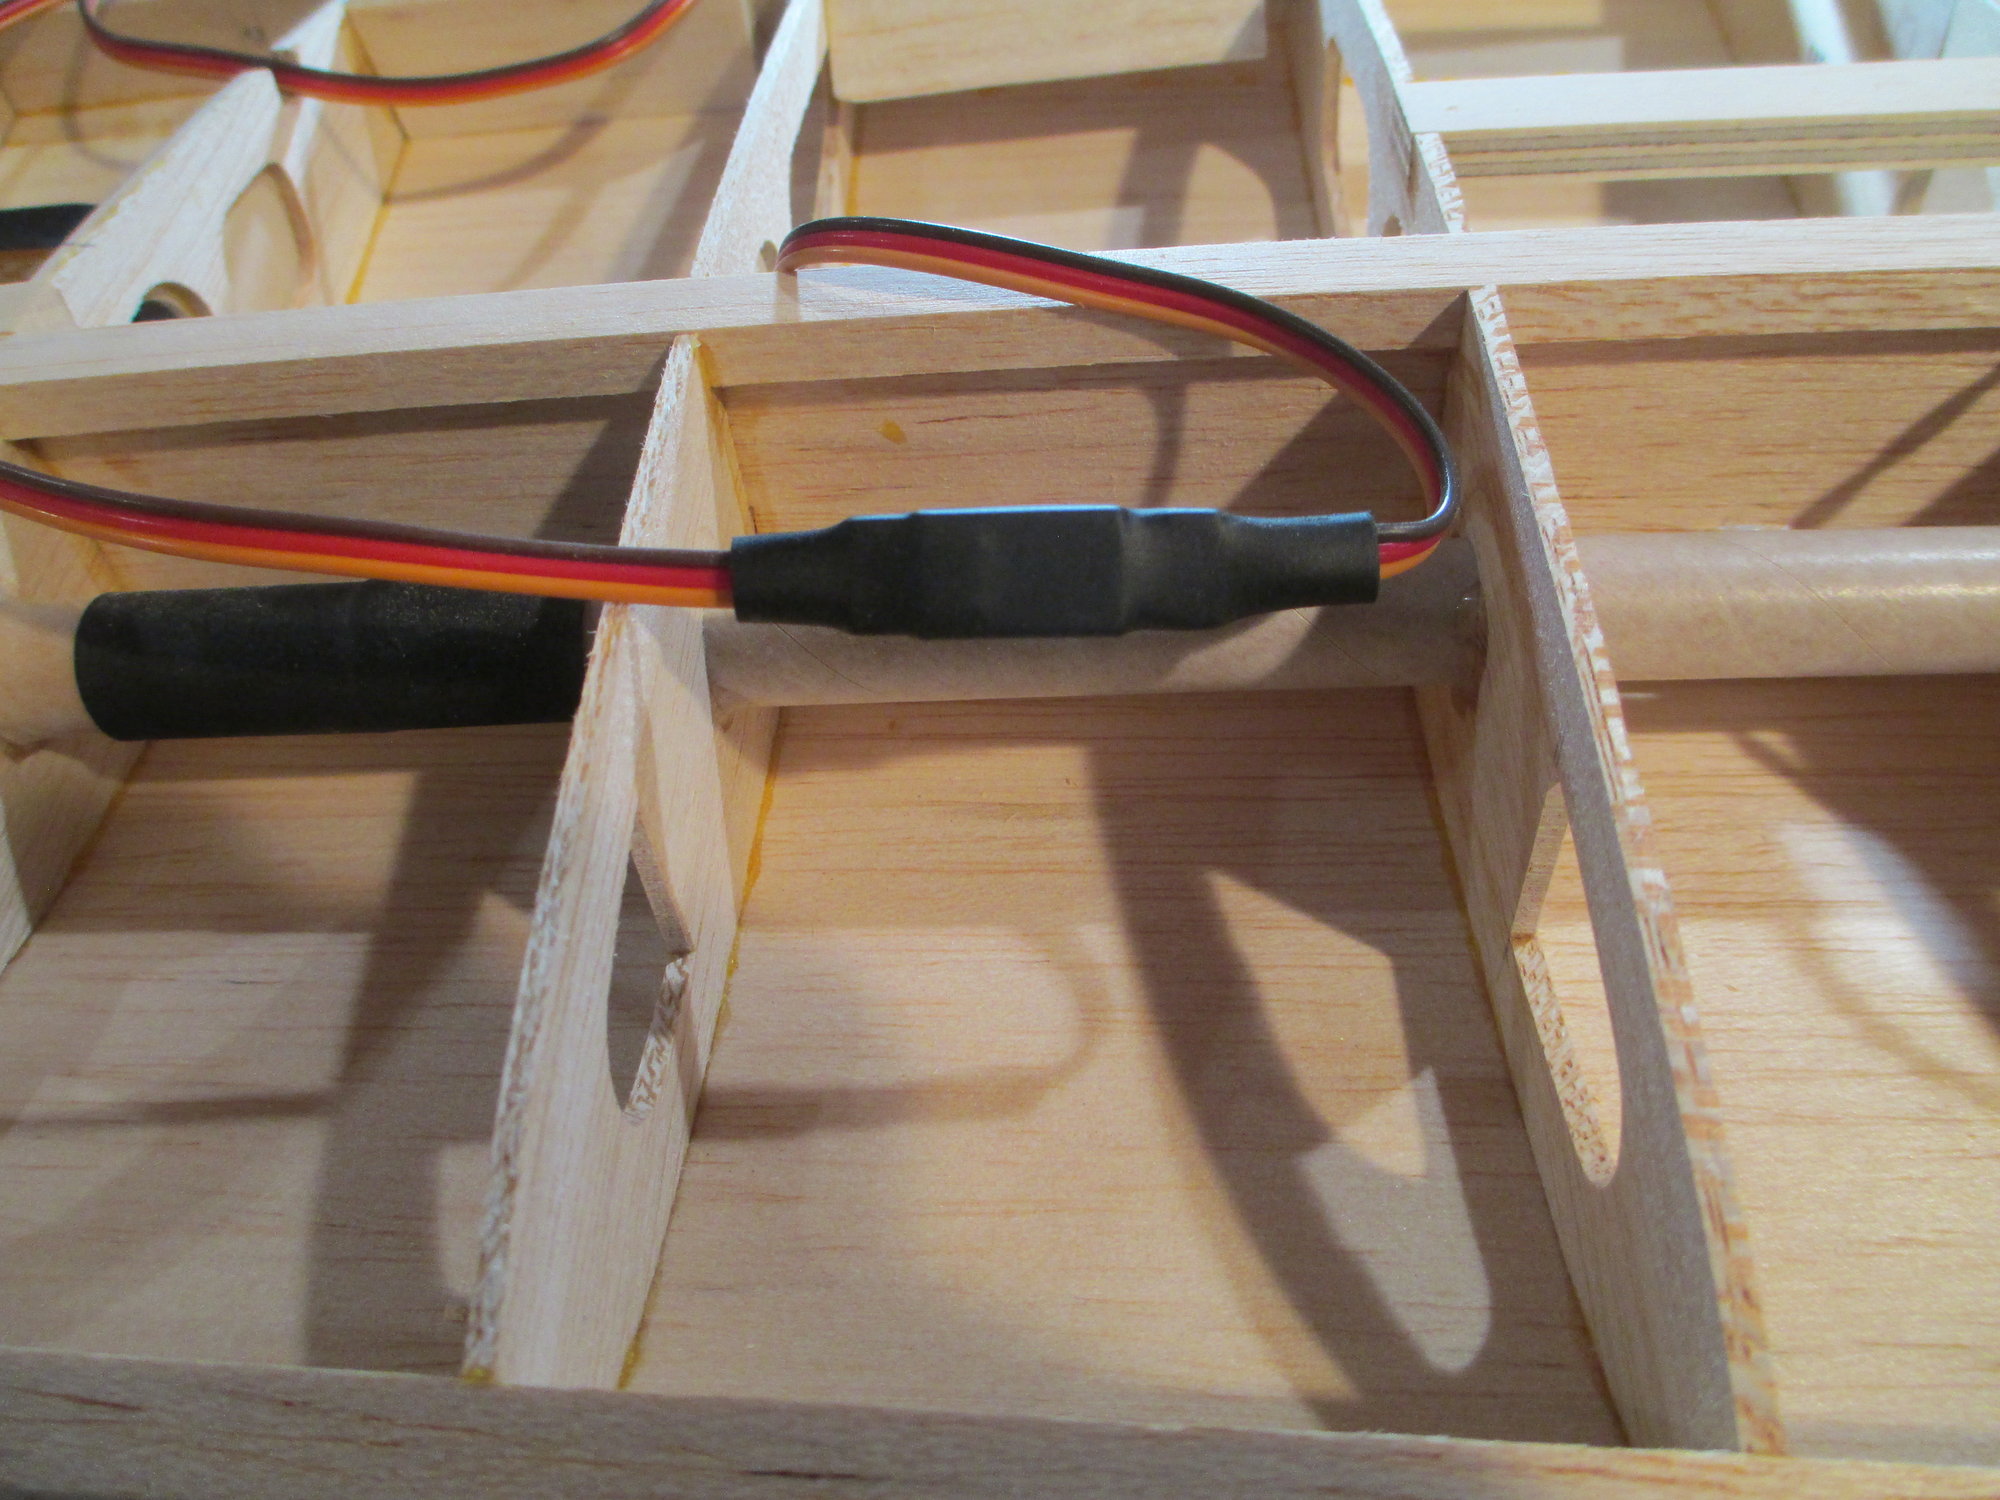
This is how it should look like completed. Trust me in that this connection worn't separate and it will also be protected from moisture. In the future, should this connection need to be separated, simply slice the heat shrink off...
Last edited by VincentJ; 09-15-2019 at 03:04 AM.
09-15-2019, 05:01 PM
#255
My Feedback: (2)
Hi Vincent, I did exactly the same thing with my dual Ailerons on my A-Ray. Do you a Y adapter where the leads come together in the center of the wing? I did this but I also bought a reverser that i got a swap meet and I was talking to a fellow modeler who told me that I didn't need this because i could just put the link on the opposite side that rotates the other direction. I have not finished construction yet on this wing but i have two other wings that will need the same set up! I hope to get this done this year but I have working very long hours lately and don't have much free time except on weekends
Thank You
Michael
Thank You
Michael
09-15-2019, 11:19 PM
#257
Thread Starter
Hi Vincent, I did exactly the same thing with my dual Ailerons on my A-Ray. Do you a Y adapter where the leads come together in the center of the wing? I did this but I also bought a reverser that i got a swap meet and I was talking to a fellow modeler who told me that I didn't need this because i could just put the link on the opposite side that rotates the other direction. I have not finished construction yet on this wing but i have two other wings that will need the same set up! I hope to get this done this year but I have working very long hours lately and don't have much free time except on weekends
Thank You
Michael
Thank You
Michael
I hear you on the long hours. After a long day at work, I head to the gym for 1-1/2 hours, then home to cook dinner and eat. By that time I'm beat and too tired to make it into my workshop.

Last edited by VincentJ; 09-15-2019 at 11:34 PM.
09-15-2019, 11:25 PM
#258
Thread Starter
[QUOTE=FlyerInOKC;12550551]As cheap as servos are now days it doesn't make sense NOT to have dual servos for the ailerons and the flaps. In some cases I have added a separate servo for a nose and/or tail wheel.[/QUOTE
Mike I agree with you. Any time I'm building and the plans call for a single servo to actuate two ailerons, that is the first thing that gets that gets changed using two servos...
Mike I agree with you. Any time I'm building and the plans call for a single servo to actuate two ailerons, that is the first thing that gets that gets changed using two servos...
09-16-2019, 03:26 AM
#259
The shrink over the servo-extension connection is obviously a good thing, but why do you bother with this connection instead of simply cutting off the plug and receptacle, and making a soldered connection between servo and extension?
I always extend the servo leads that way, and have found it to also be economical (I buy servo wire by lengths of several meters, very cheap). If you need to replace a servo (a rare occasion) you can always cut the wires and re-solder a new one.
I always extend the servo leads that way, and have found it to also be economical (I buy servo wire by lengths of several meters, very cheap). If you need to replace a servo (a rare occasion) you can always cut the wires and re-solder a new one.
Last edited by EF; 09-16-2019 at 03:30 AM.
09-16-2019, 04:23 AM
#260
Thread Starter
The shrink over the servo-extension connection is obviously a good thing, but why do you bother with this connection instead of simply cutting off the plug and receptacle, and making a soldered connection between servo and extension?
I always extend the servo leads that way, and have found it to also be economical (I buy servo wire by lengths of several meters, very cheap). If you need to replace a servo (a rare occasion) you can always cut the wires and re-solder a new one.
I always extend the servo leads that way, and have found it to also be economical (I buy servo wire by lengths of several meters, very cheap). If you need to replace a servo (a rare occasion) you can always cut the wires and re-solder a new one.
09-16-2019, 06:56 AM
#261
Member

I agree. I've even seen separate servos for each gear door. I started a TF P-51 years ago and its still sitting in a half-built state. It has single servo with bellcranks for the ailerons but I plan on modifying it to dual servos. In my recent work I've opted for Y-cables but I see the value in using separate channels for ailerons (aileron and Aux in my case).
09-16-2019, 10:33 AM
#262
My Feedback: (2)
Hey Vincent, I just happend to have Futaba 8JA and I think there is mod in the set up where i can do that I just havent got that far into the programming end yet! I work night M-F and the last two I came in at 5:30 pm. I didnt get off until 8 am the next day and this happened almost every day that week and to the middle of last week when it started to trend down. Mondays are always the worst day. so we shall see thanks
Michael
Michael
09-23-2019, 03:22 PM
#263
Thread Starter
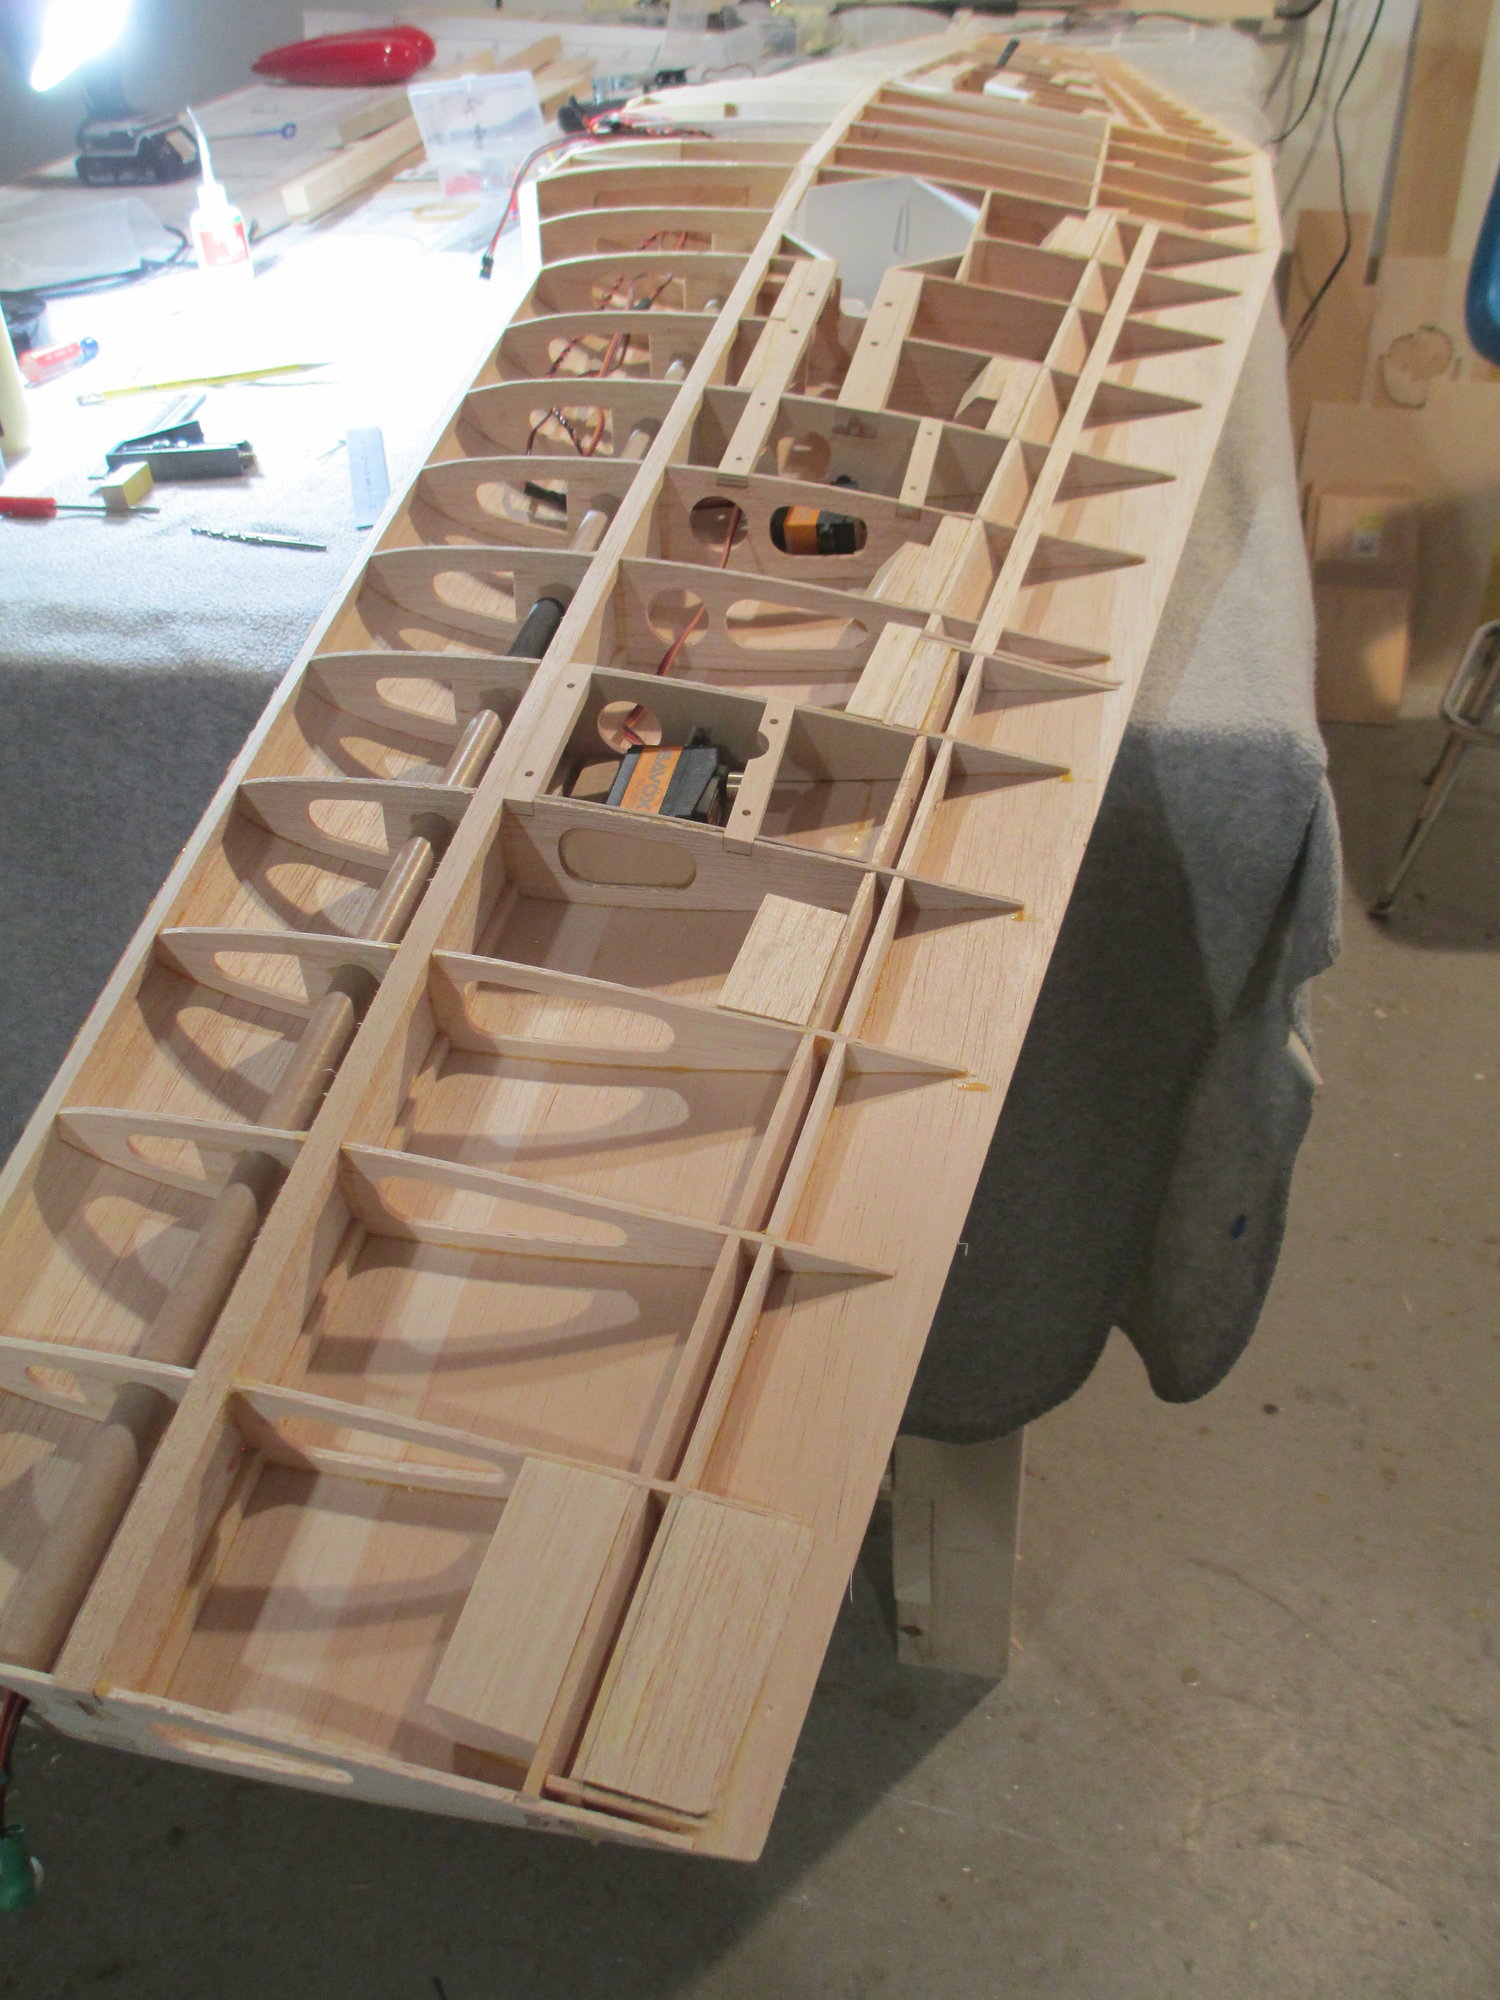
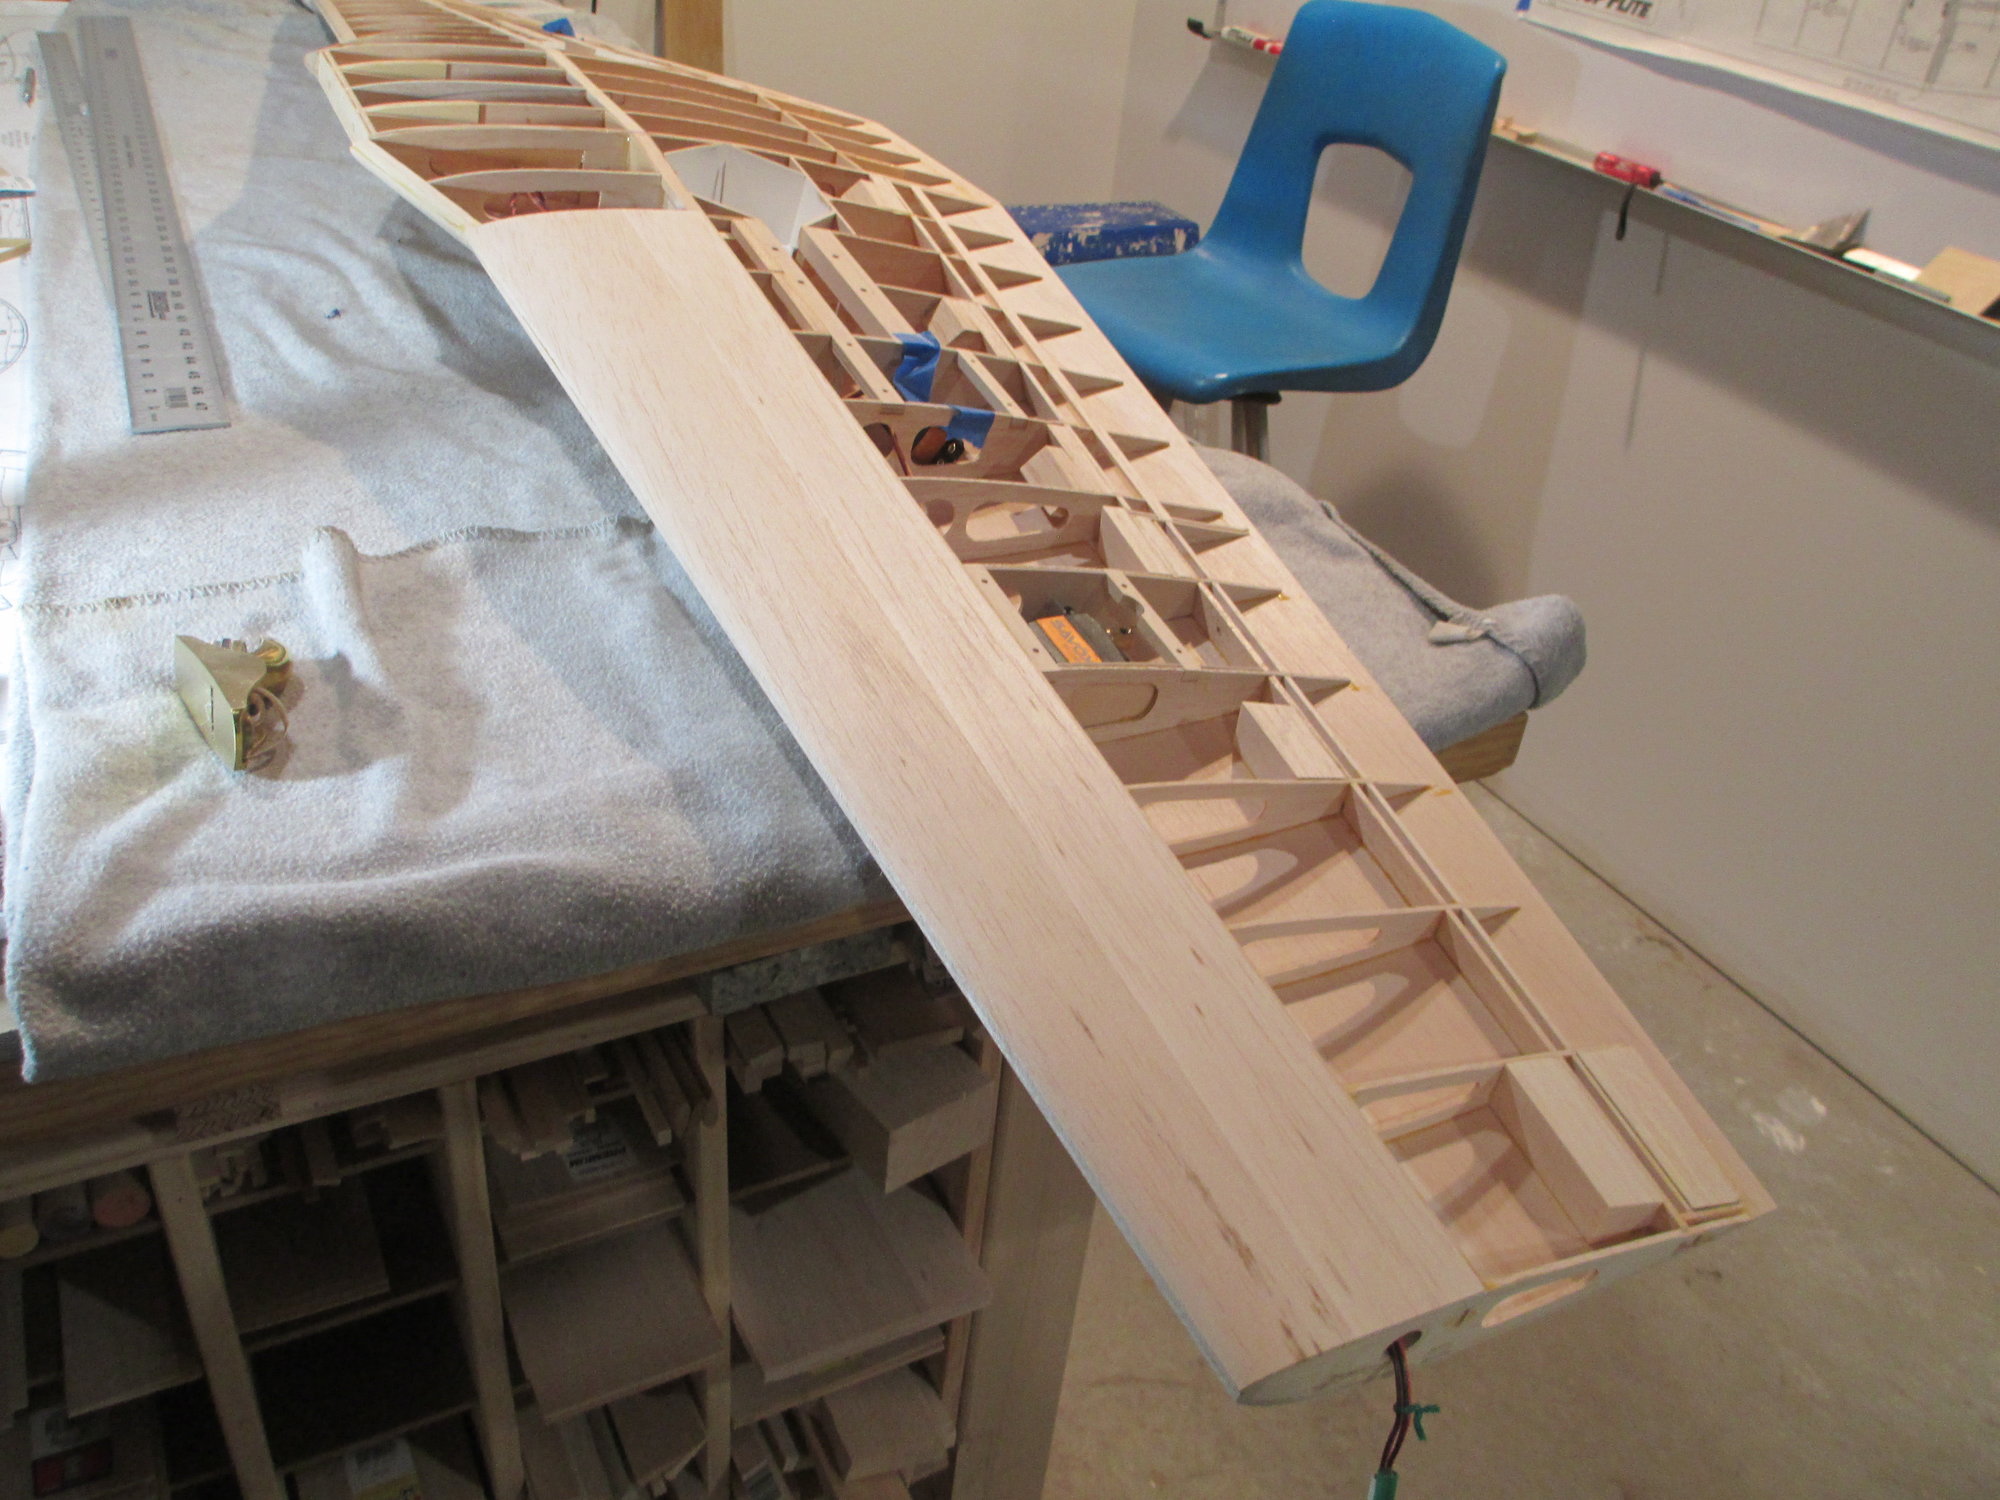
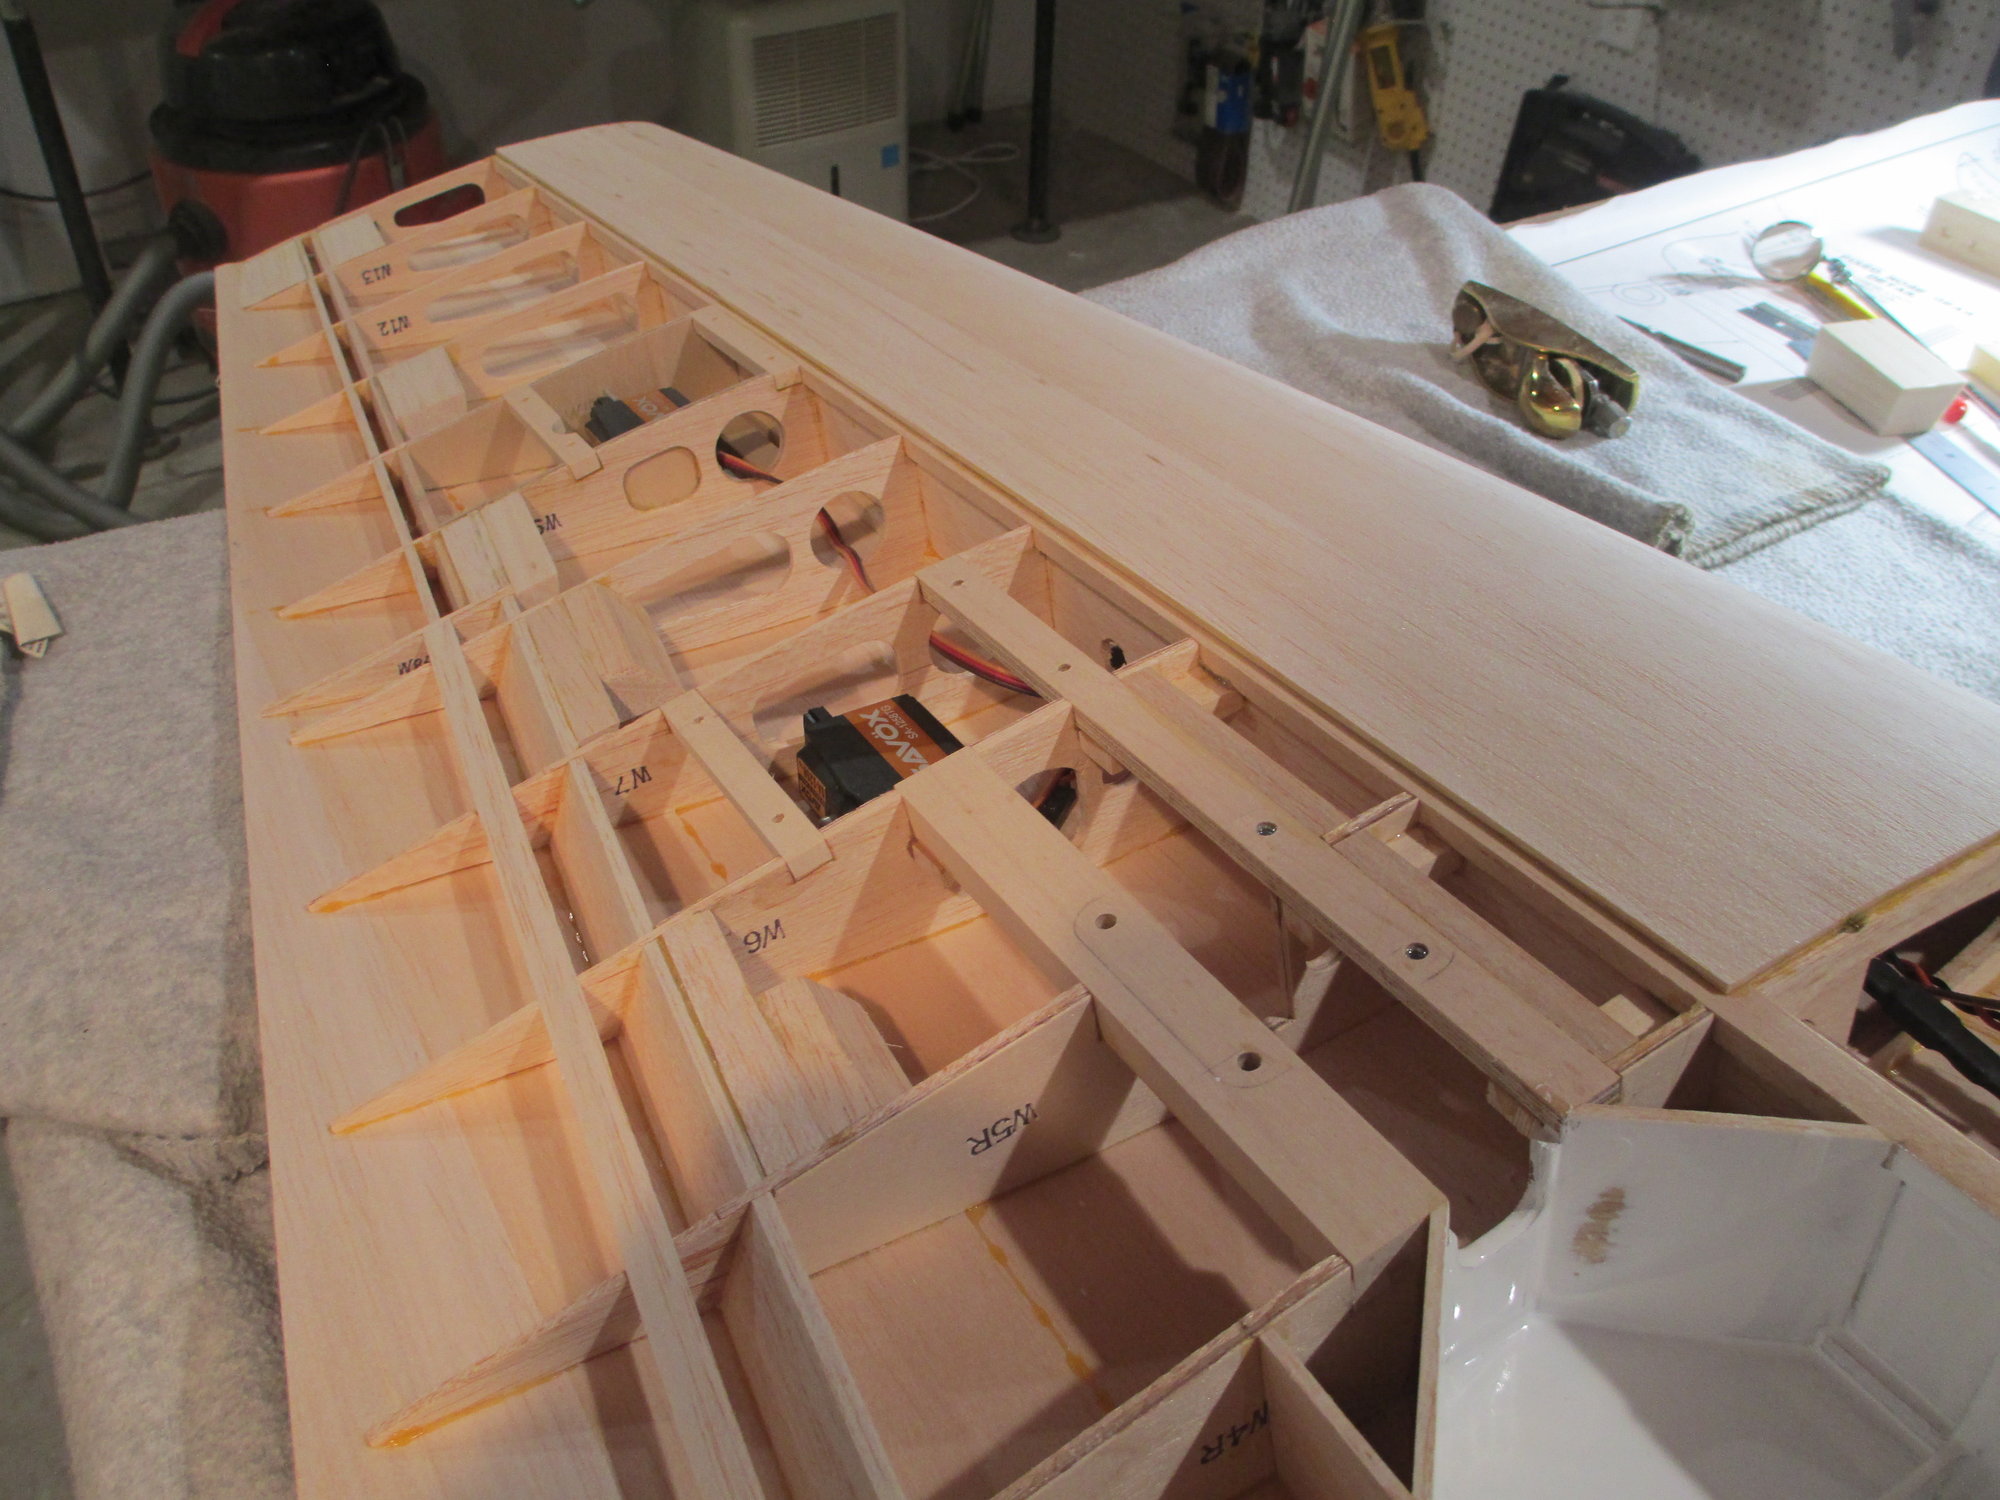
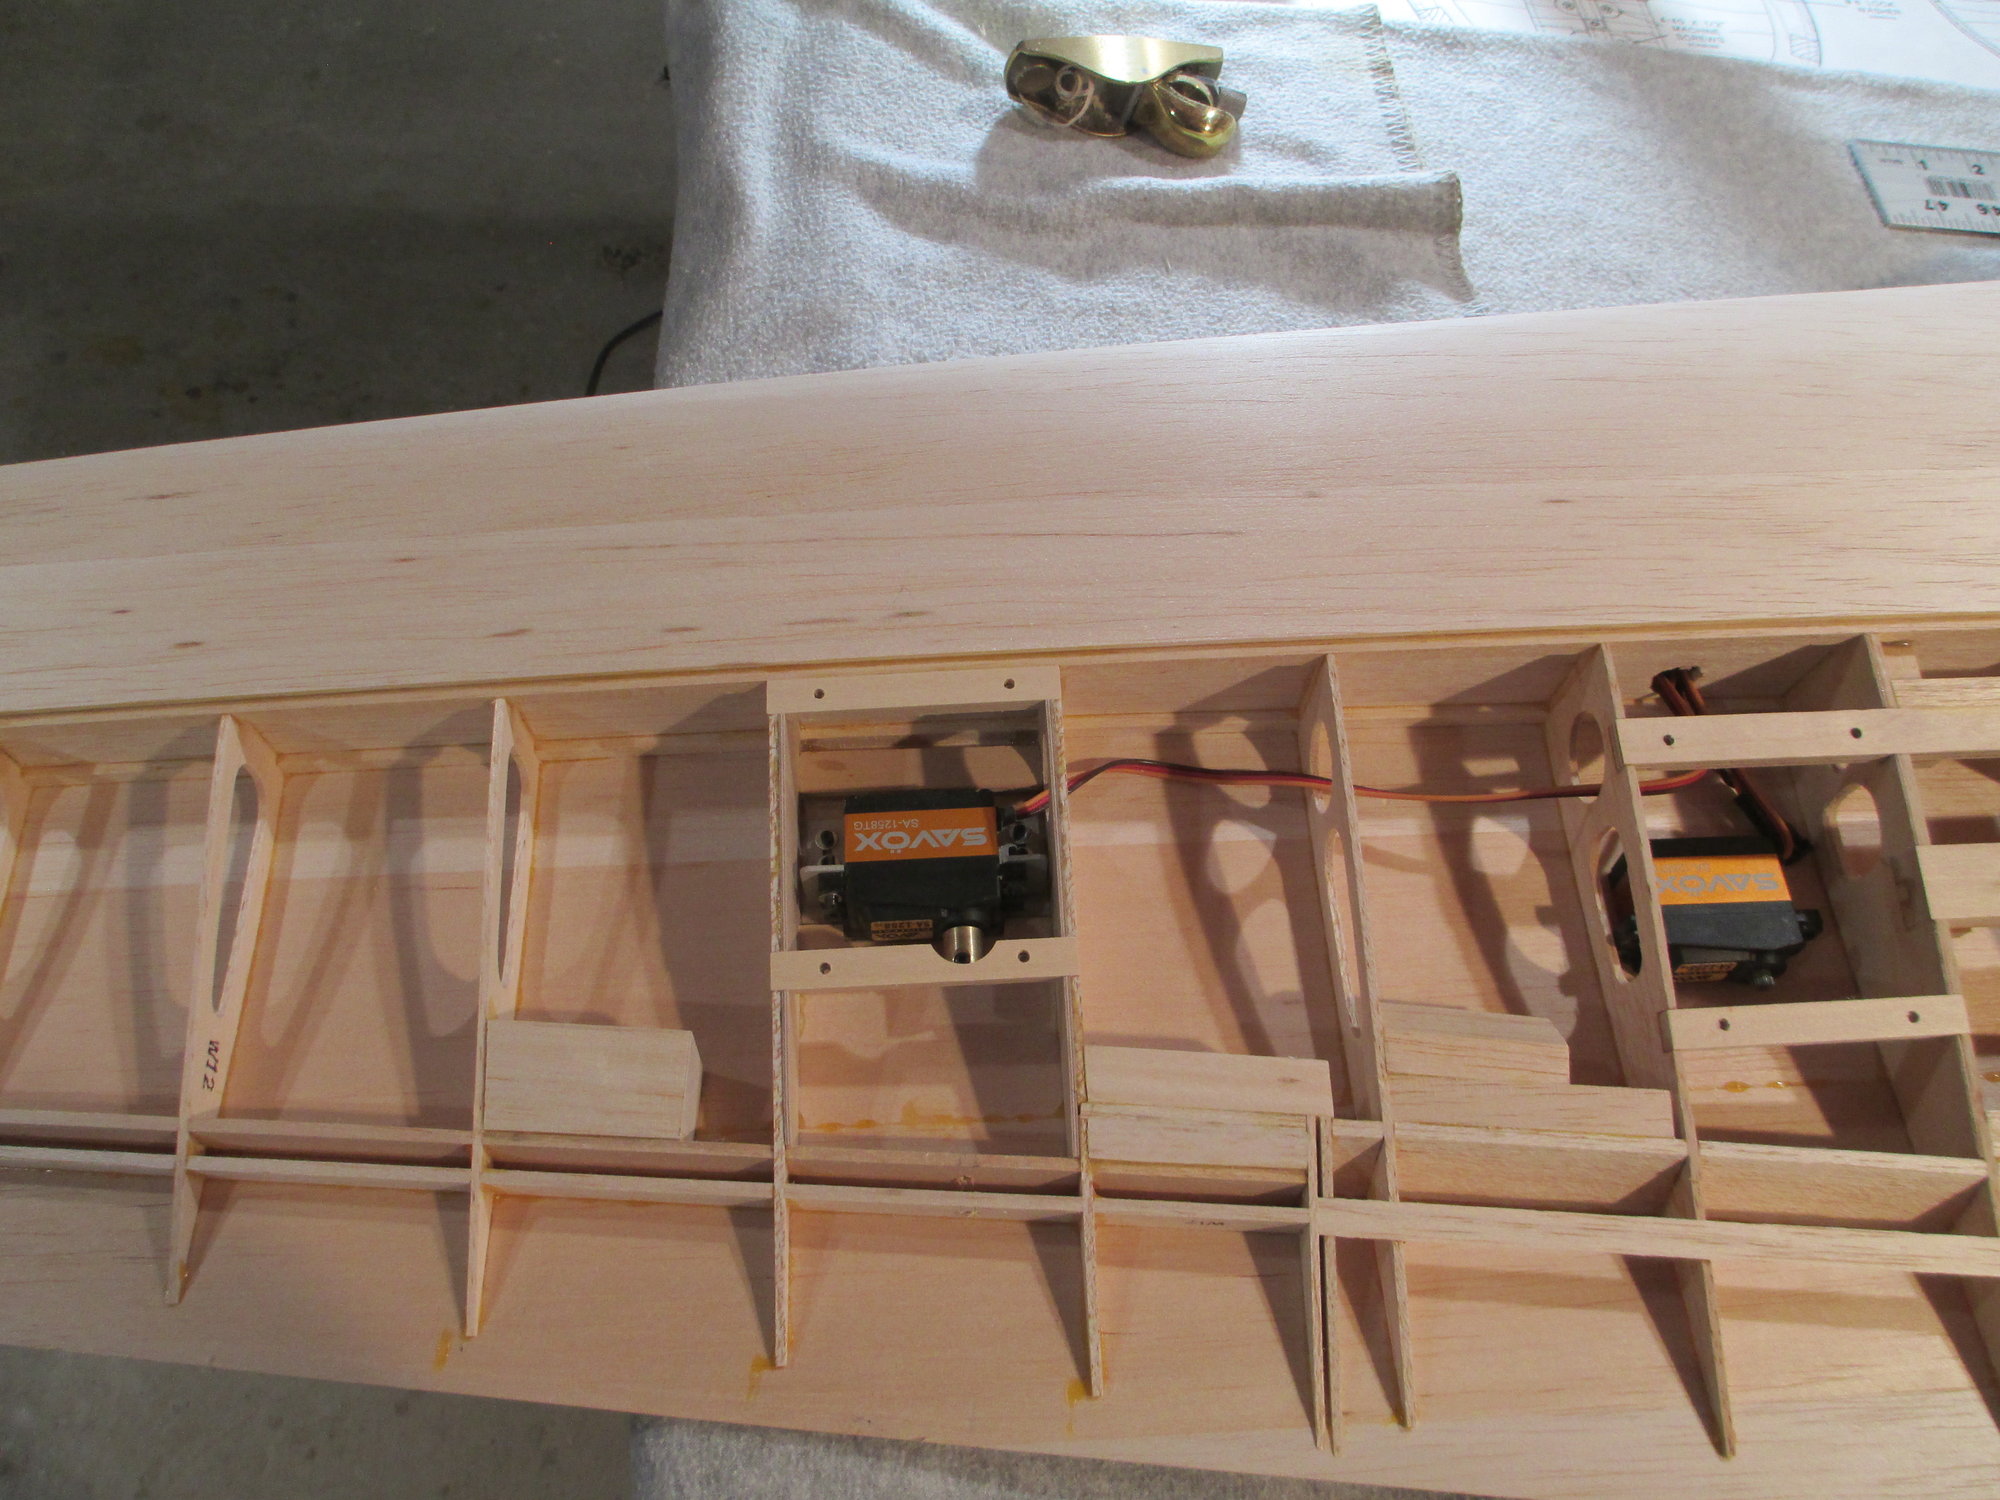
The hinge blocking for the flaps and ailerons have all been installed in the wing. I can start on sheeting and closing off the wing now.
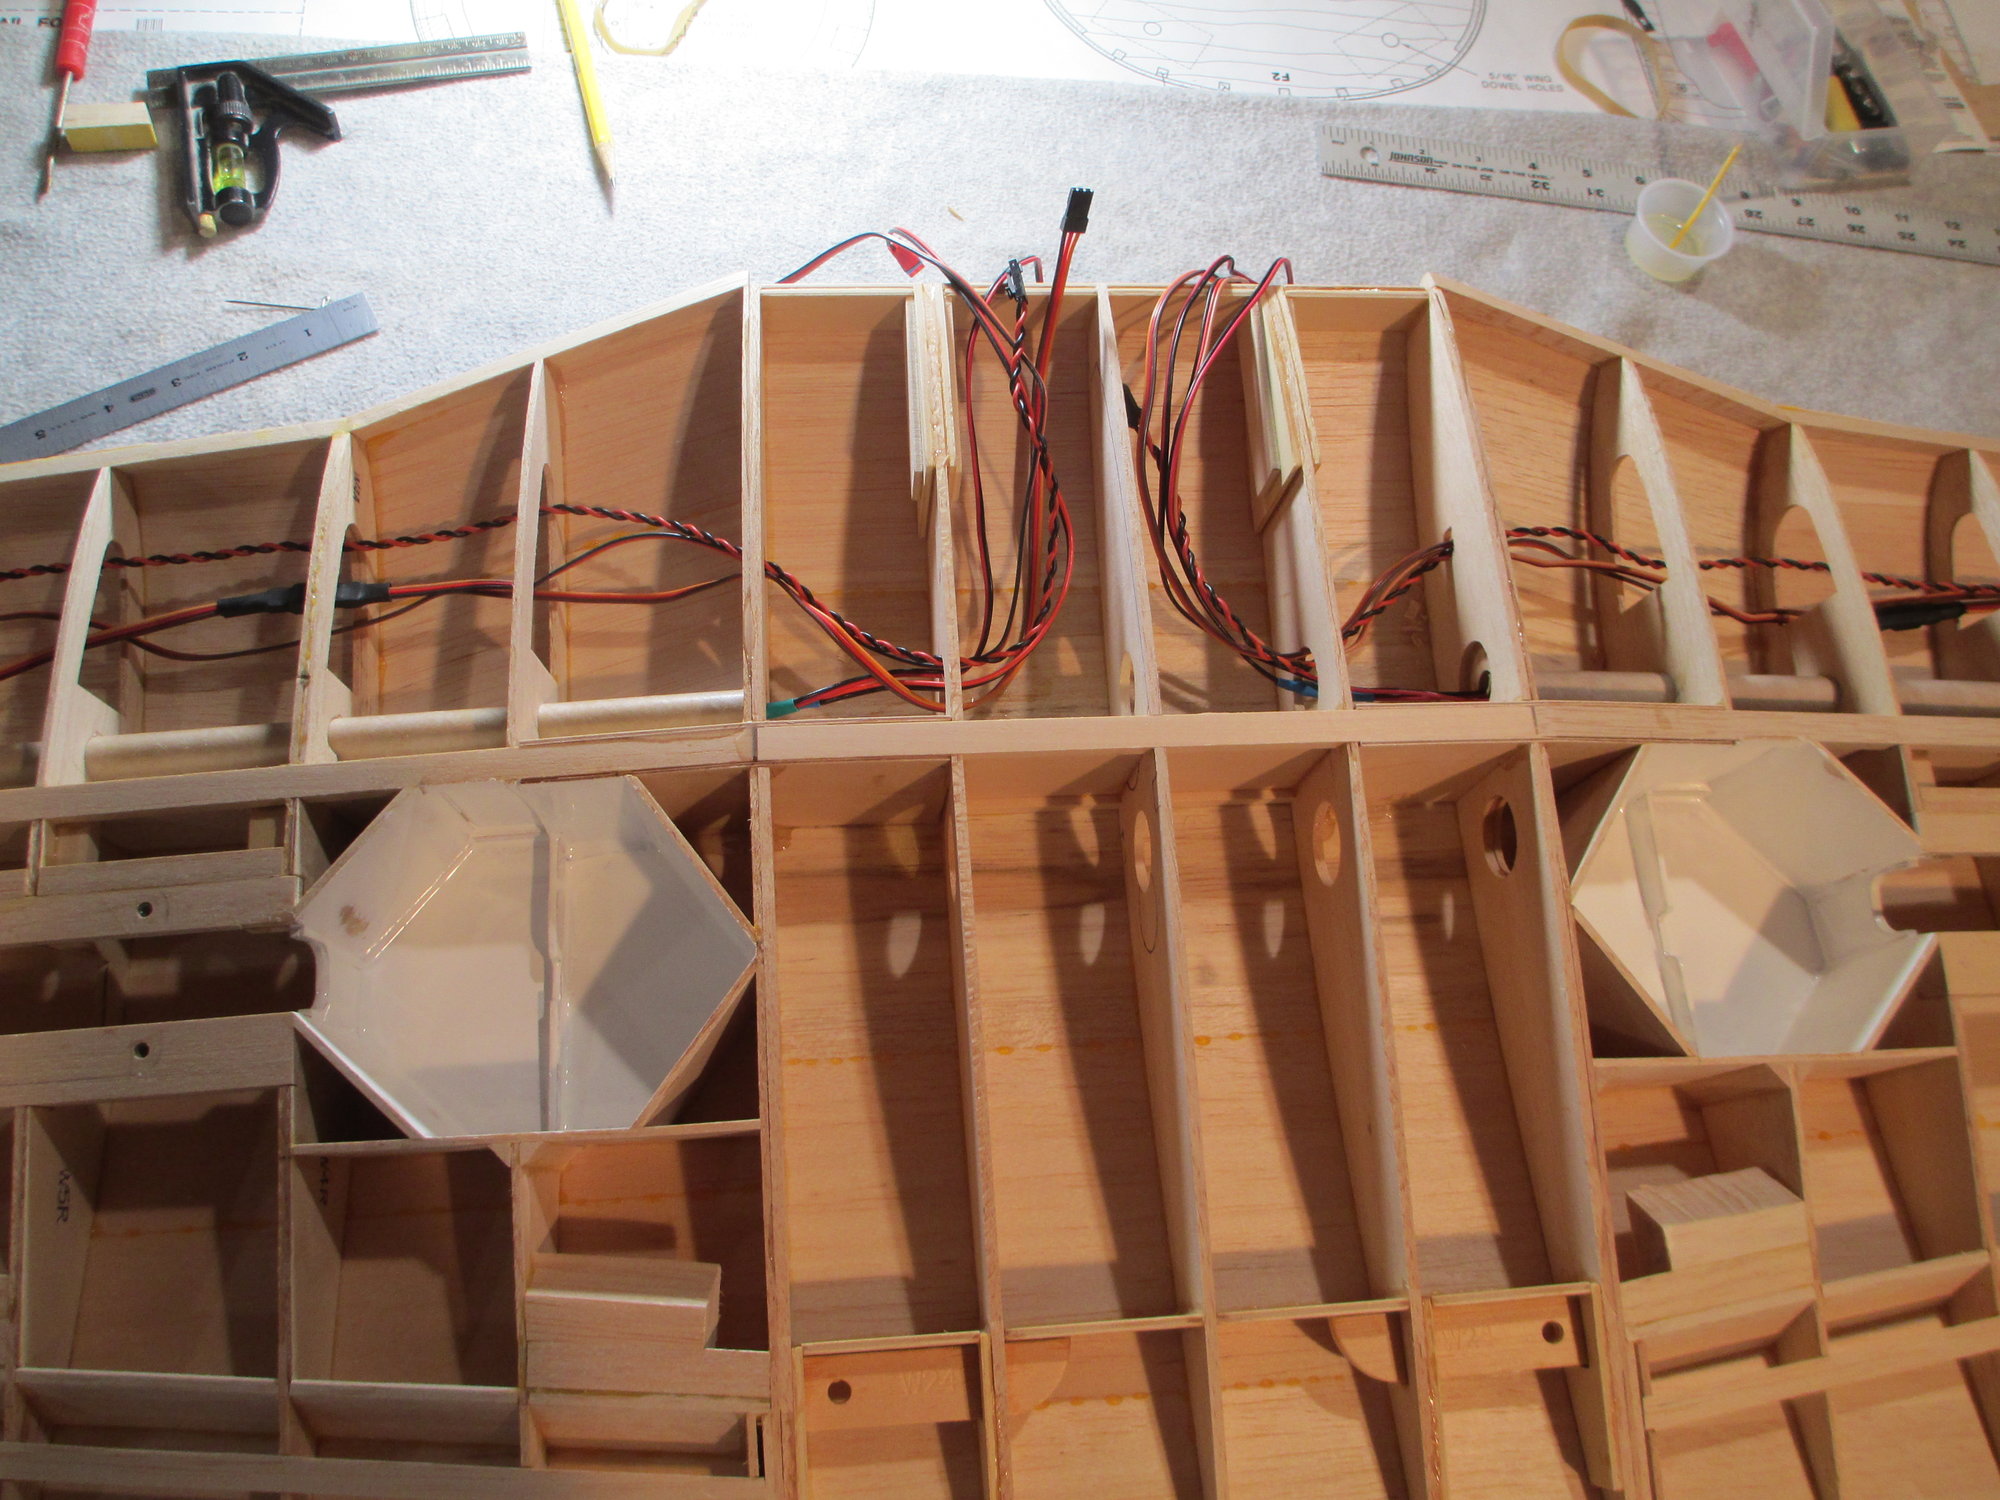
In preparation for sheeting, I had to run all of the wires in the wing. With flaps. ailerons, retracts and navigational lights to operate, the amount of wiring inside the wing is substantial.
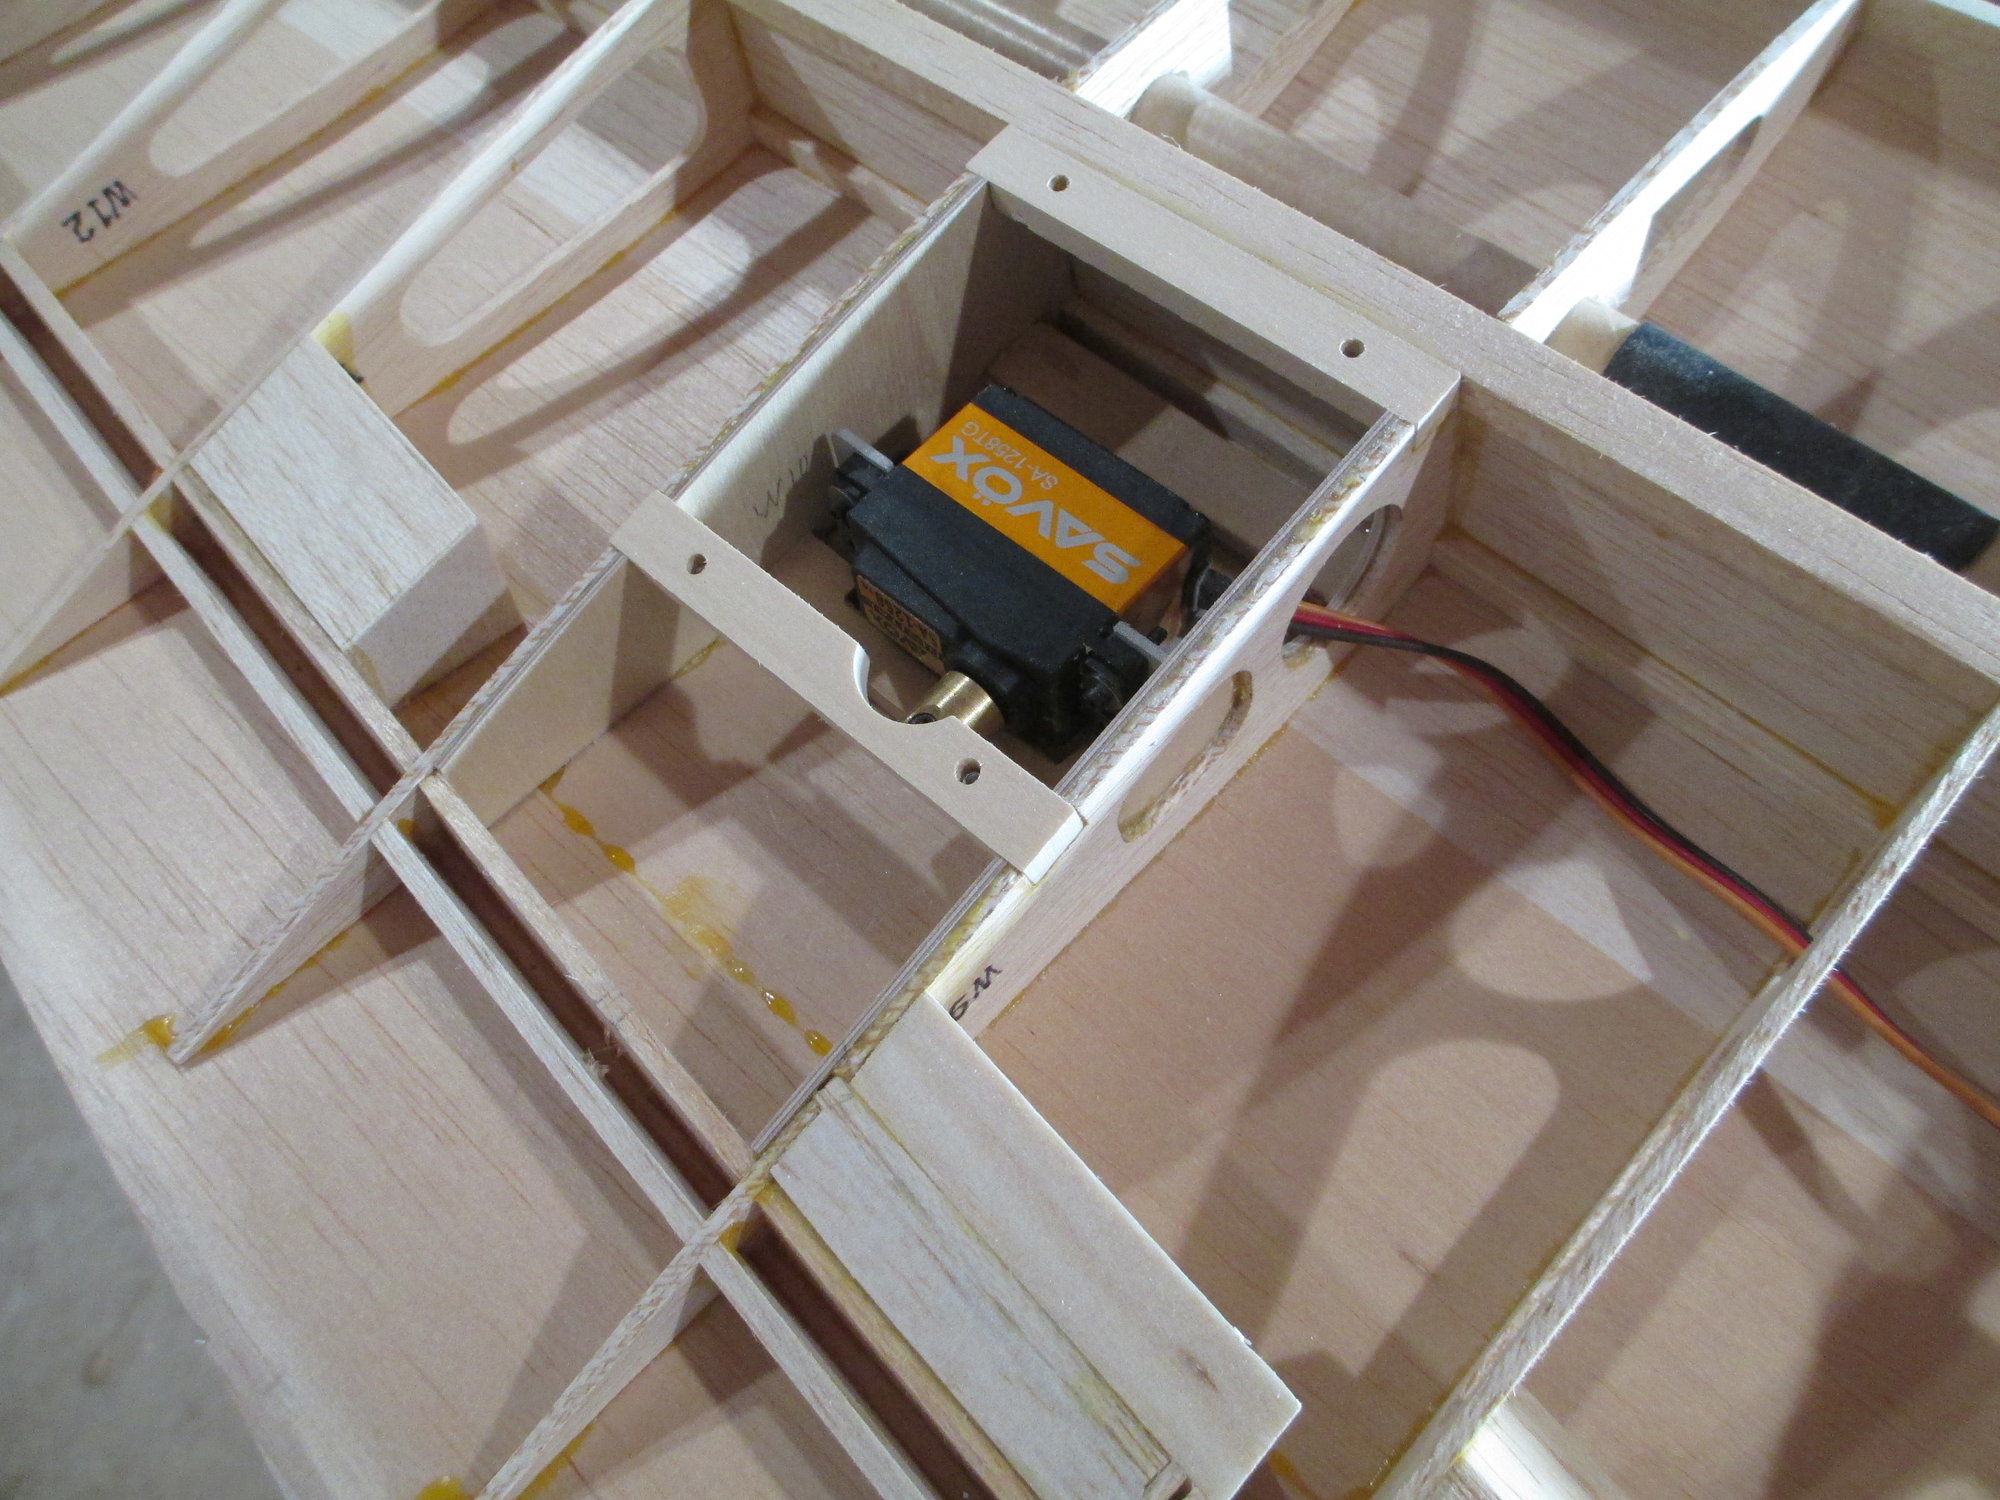
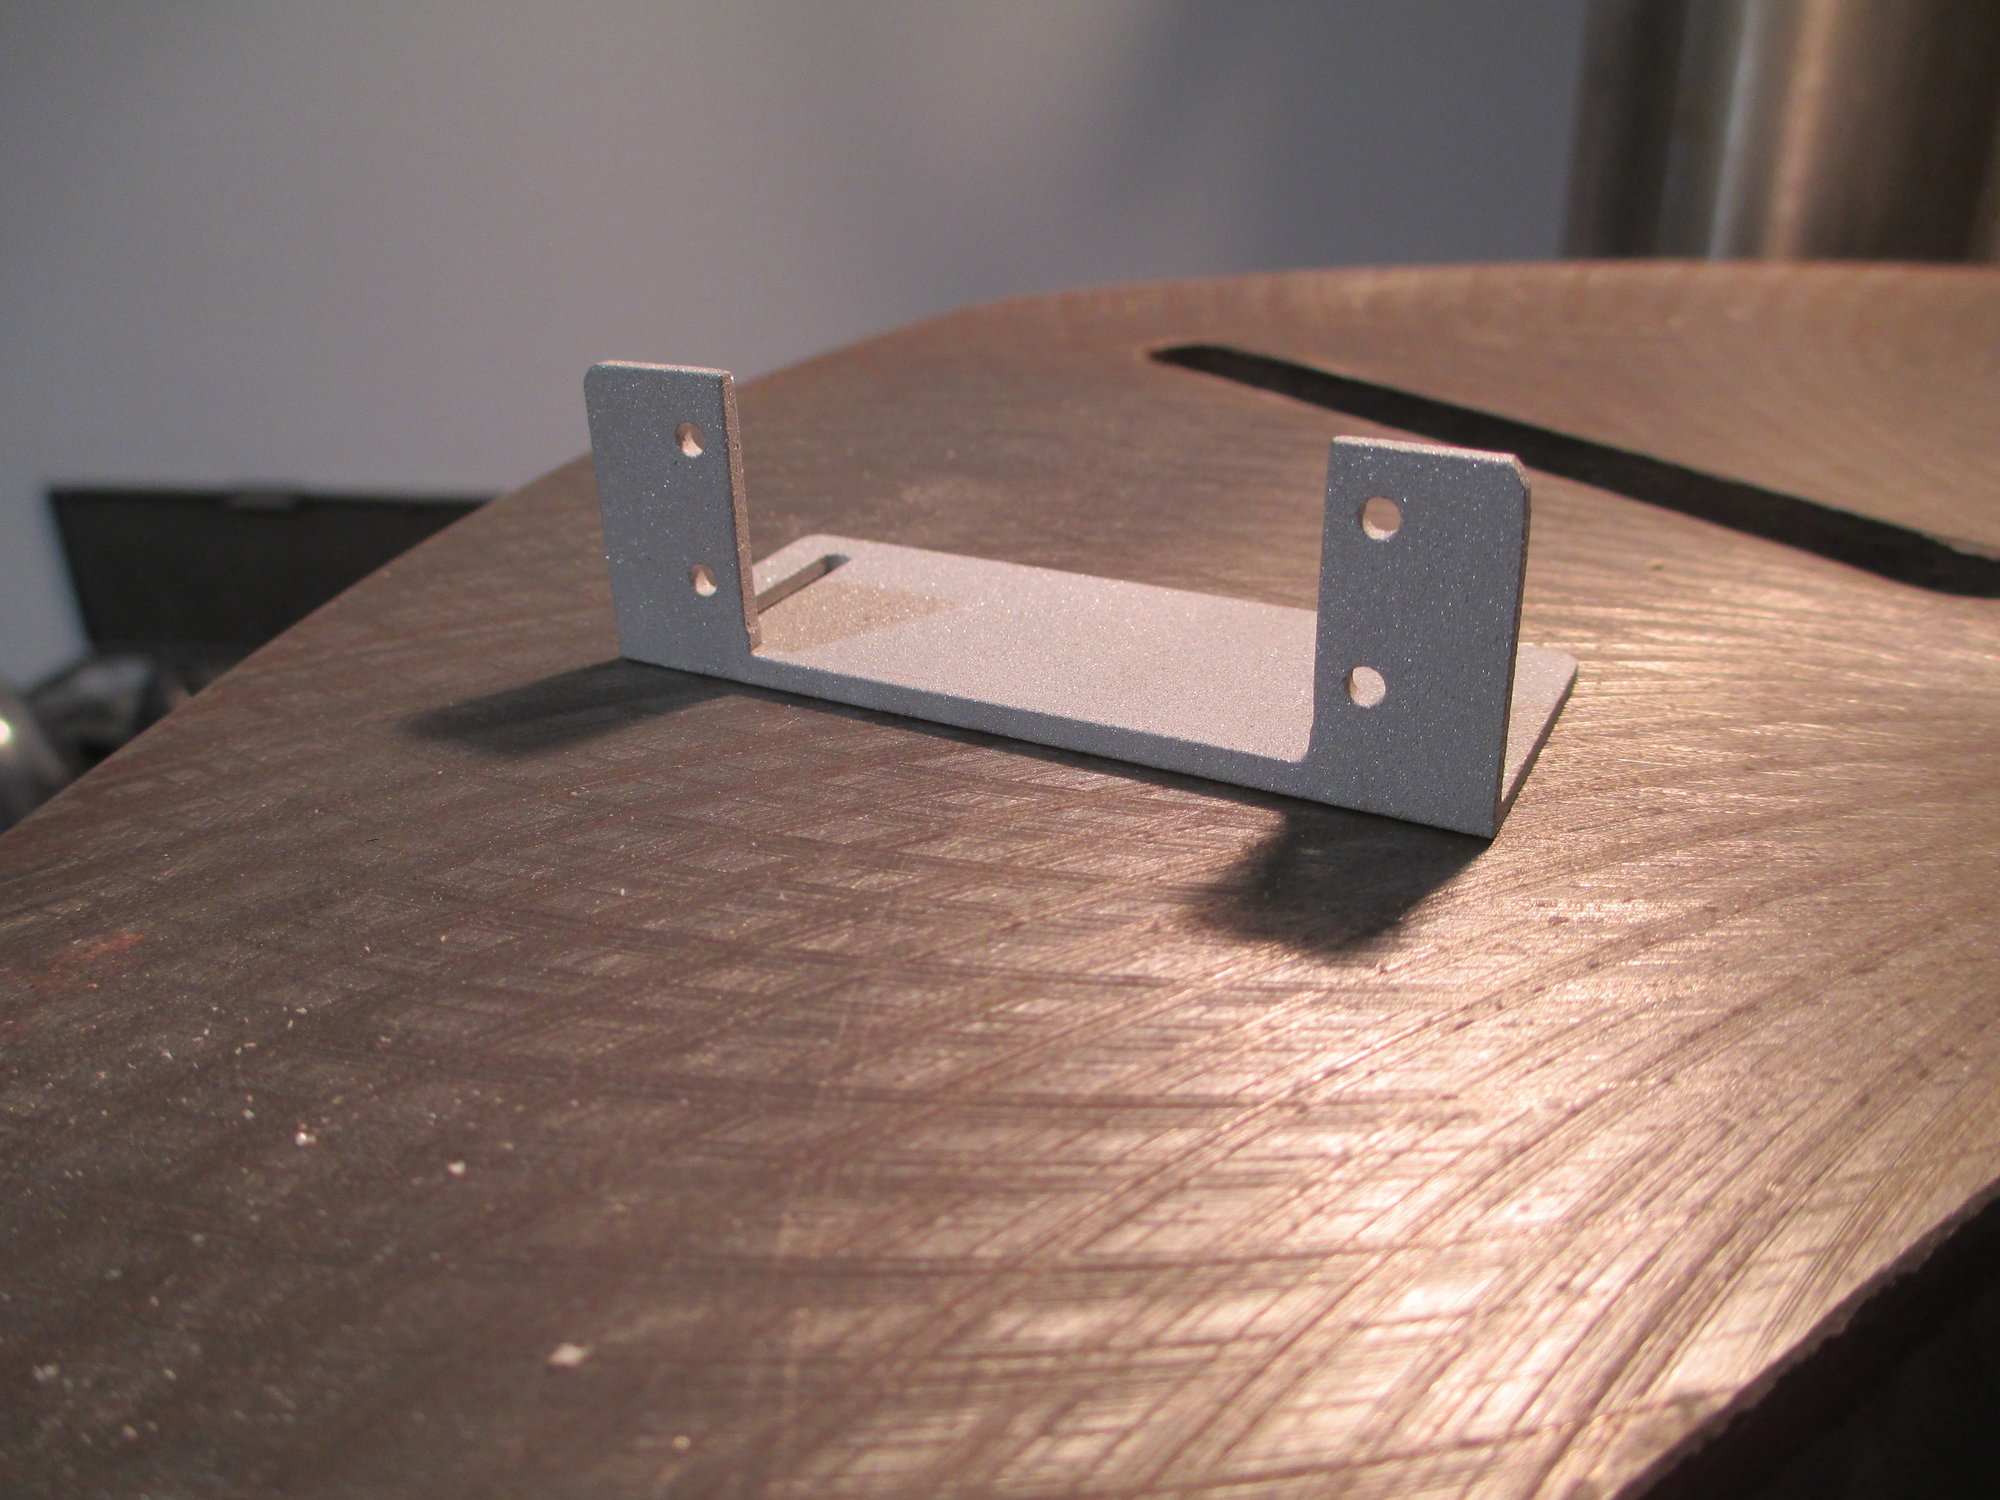
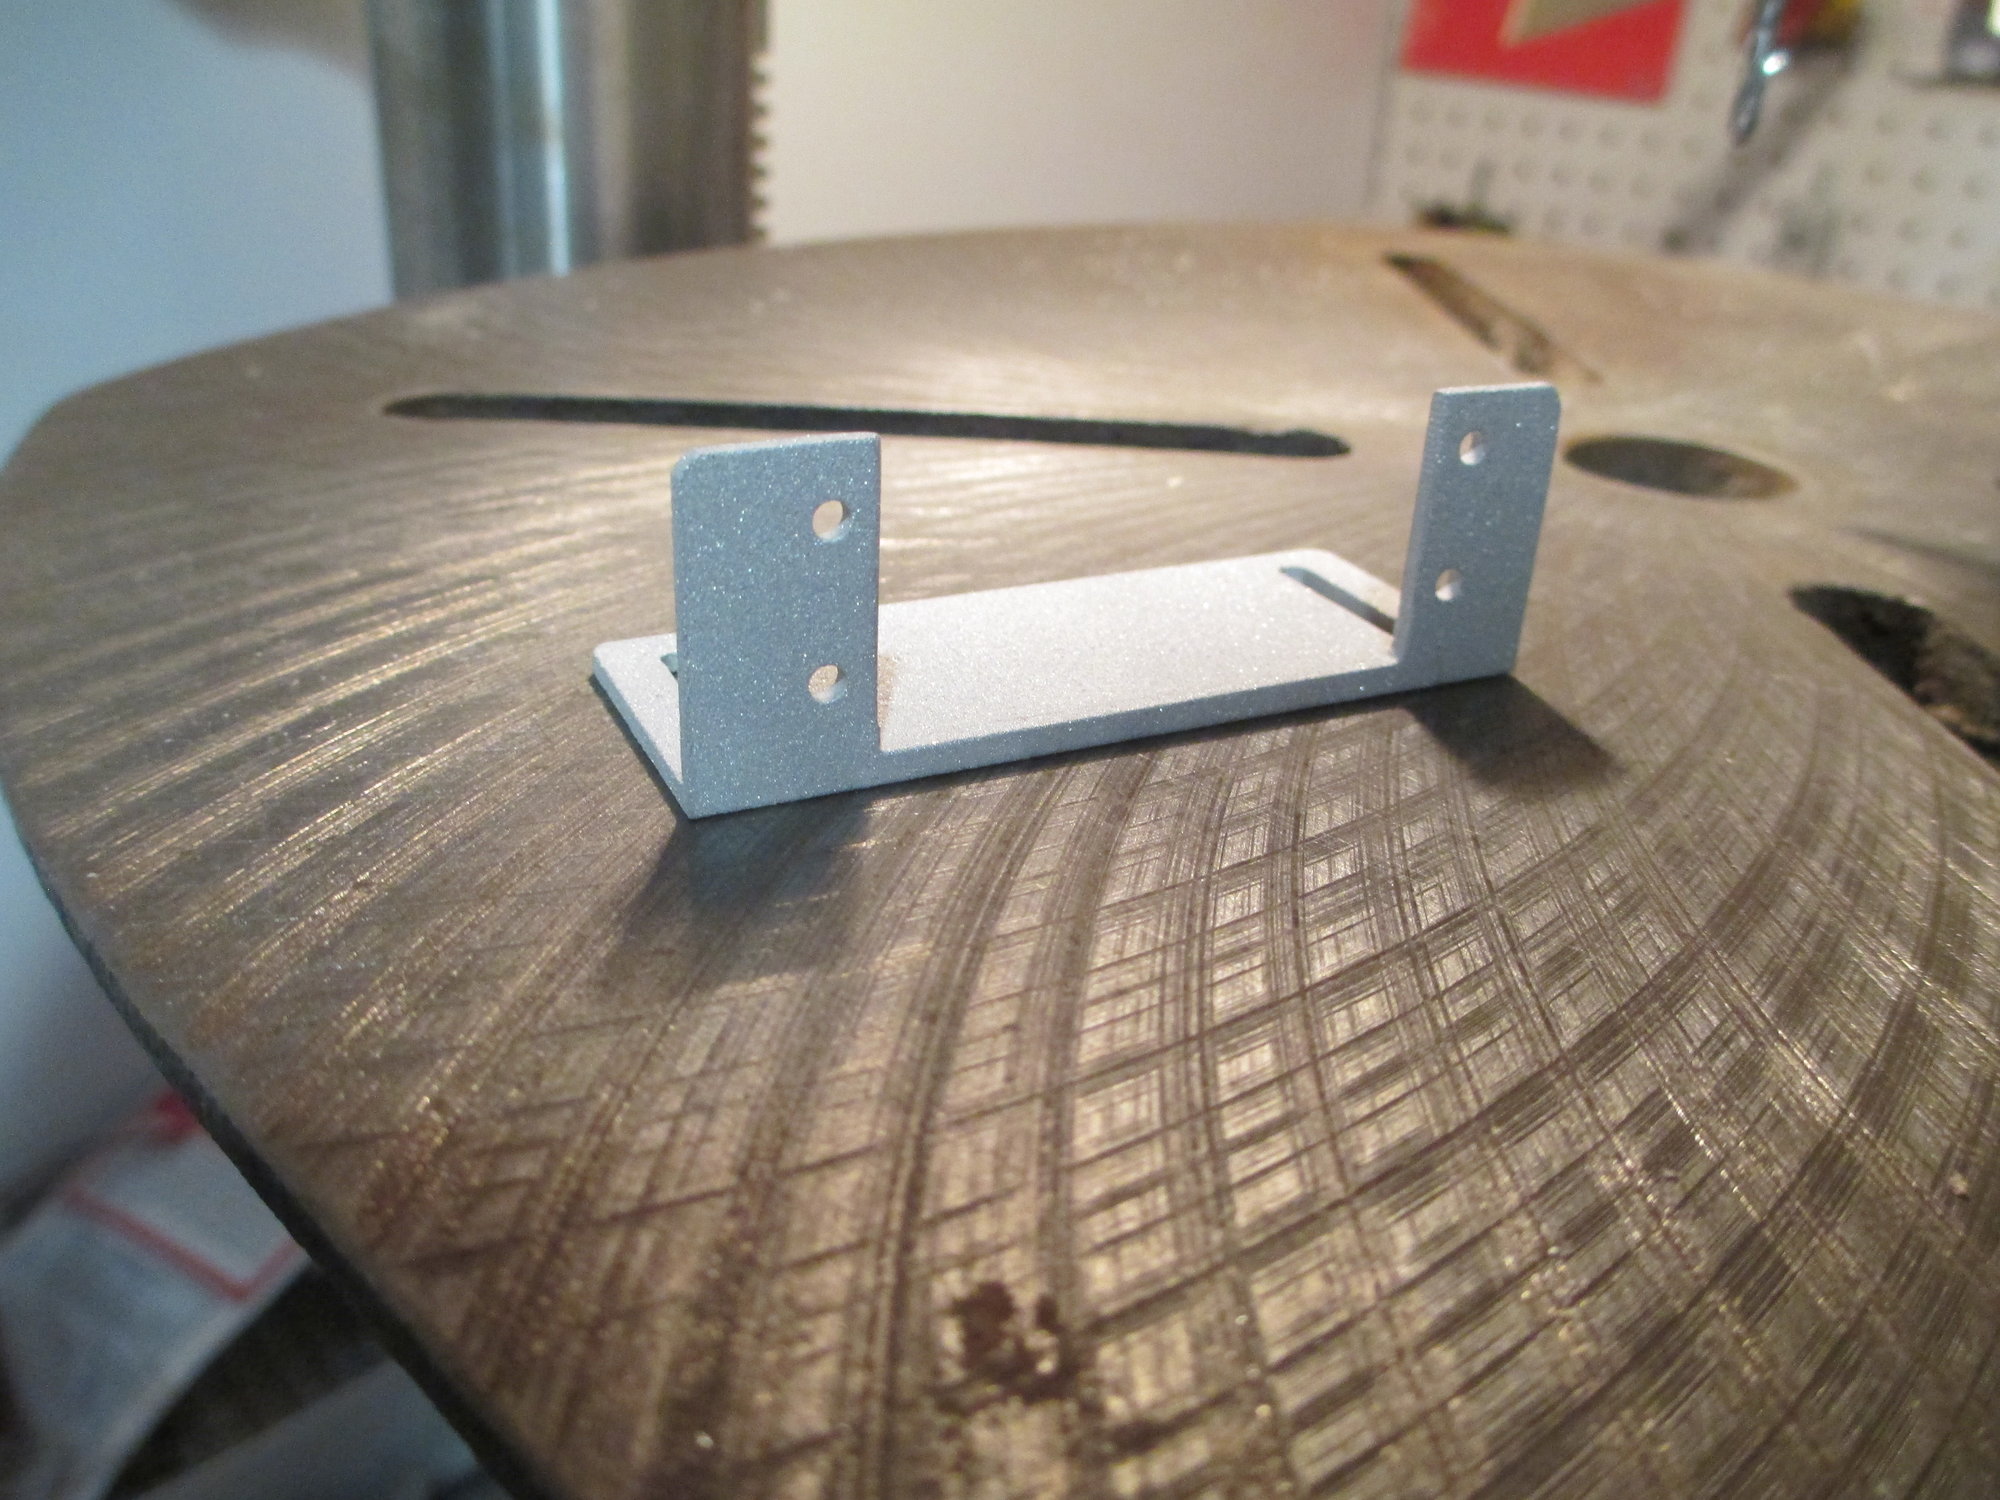
Close up of the blocking that will hold the servo access hatch. Four 2-56 cap head screws will secure the hatch to the wing. Note the cutout to facilitate access the RDS (Rotary Drive System) set screw...
Last edited by VincentJ; 09-24-2019 at 06:40 AM.

 09-24-2019, 02:00 AM
#267
Glad to hear that. I've spent hours working on electrical systems where nothing was labelled by people that didn't know what they were doing. Needless to say, if someone asks me for help now, they get told no if they have already starting taking things apart
09-24-2019, 04:51 AM
#268


Yeah. Those structures are a work of art. Makes me think of Michael Angelo's drawings of his flying machines.
After finishing the Bonanza, the designer of this model must have spent hours nodding his head in amazement of his finished work.
Thanks for posting such good, sharp photos and captions. That also takes up a lot of time in addition to the building.
After finishing the Bonanza, the designer of this model must have spent hours nodding his head in amazement of his finished work.
Thanks for posting such good, sharp photos and captions. That also takes up a lot of time in addition to the building.

 09-27-2019, 08:02 AM
#274
My Feedback: (2)
vey nice Vincent. Are going to sheet the bottom of the wing then cut your Ailerons out with a razor saw. This is a problem area for me on A-ray when I did this before it came out very crooked and it was a pain to fix them right I am going to take my time with my new build and get this right. The nice thing is that Lou Andrews provided pictures of building the airplane from the ground! It gives a pictorial view of how it should be built!
Thank You
Michael Johnston
Thank You
Michael Johnston
09-27-2019, 09:36 AM
#275
Thread Starter
vey nice Vincent. Are going to sheet the bottom of the wing then cut your Ailerons out with a razor saw. This is a problem area for me on A-ray when I did this before it came out very crooked and it was a pain to fix them right I am going to take my time with my new build and get this right. The nice thing is that Lou Andrews provided pictures of building the airplane from the ground! It gives a pictorial view of how it should be built!
Thank You
Michael Johnston
Thank You
Michael Johnston
Last edited by VincentJ; 09-27-2019 at 09:39 AM.